Need a bed (or two) but don’t wanna dedicate an entire room as a permanent “bedroom?” Is your old college futon/hand-me-down guest bed/blow-up mattress no longer cutting it? We have a solution! You should DIY your own Murphy bed! This can be an inexpensive way to add some stylish and comfy guest sleeping spaces that don’t take up space all the time. Even better — this entire project can be done over a weekend with just a few tools. Let’s go!
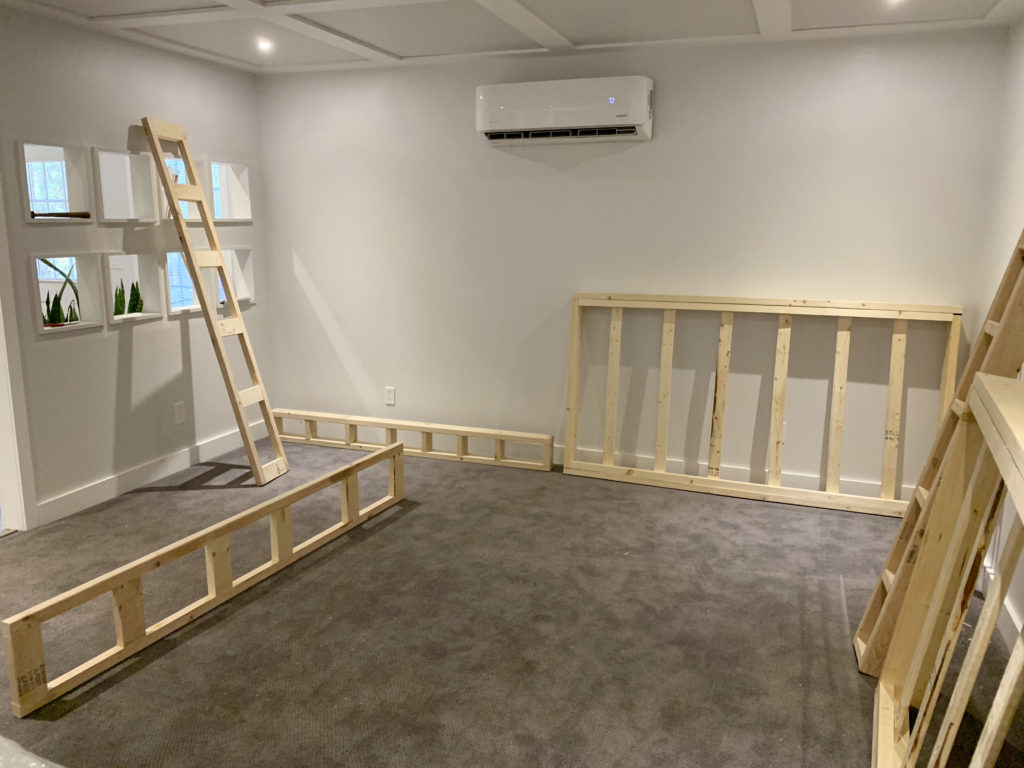
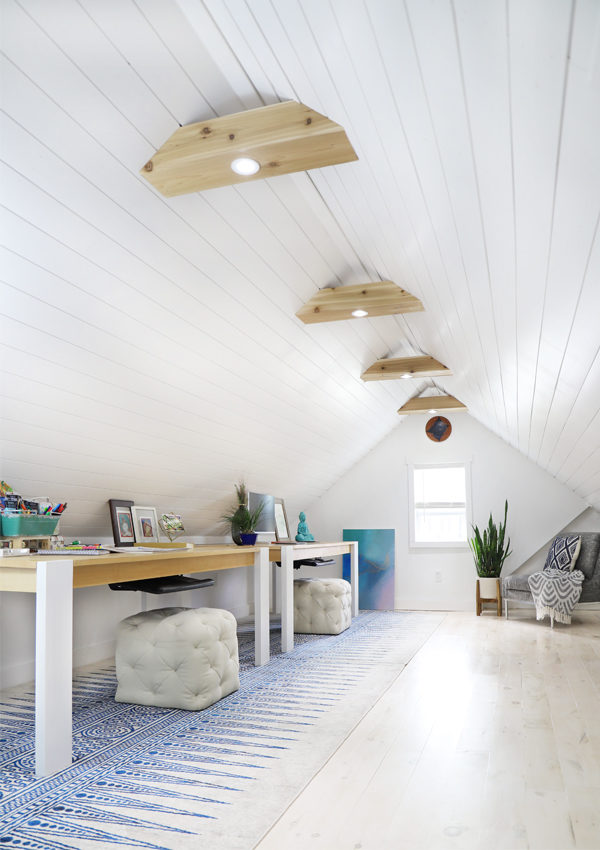
In our basement, we have an office, a media room, and an adjacent finished rec room space. We haven’t done much with the rec space, because we weren’t sure exactly how we would use it, but a game room, an extra living room, and another sleeping space for guests had each crossed our minds.
What if we could accomplish ALL of those in ONE room? Enter the Murphy bed project!
Evaluate Your Space & Guest Needs
First things first. See what’s possible with the space you have, and then, consider the needs of your guests. With the bed frame, you have two basic choices: Vertical or Horizontal. Ask yourself if you have the floor to ceiling height to install a bed. No? What if you turned the bed sideways and installed it horizontally instead? Don’t forget to measure the floor space too. Will that double or queen mattress fit and still leave room to walk around?
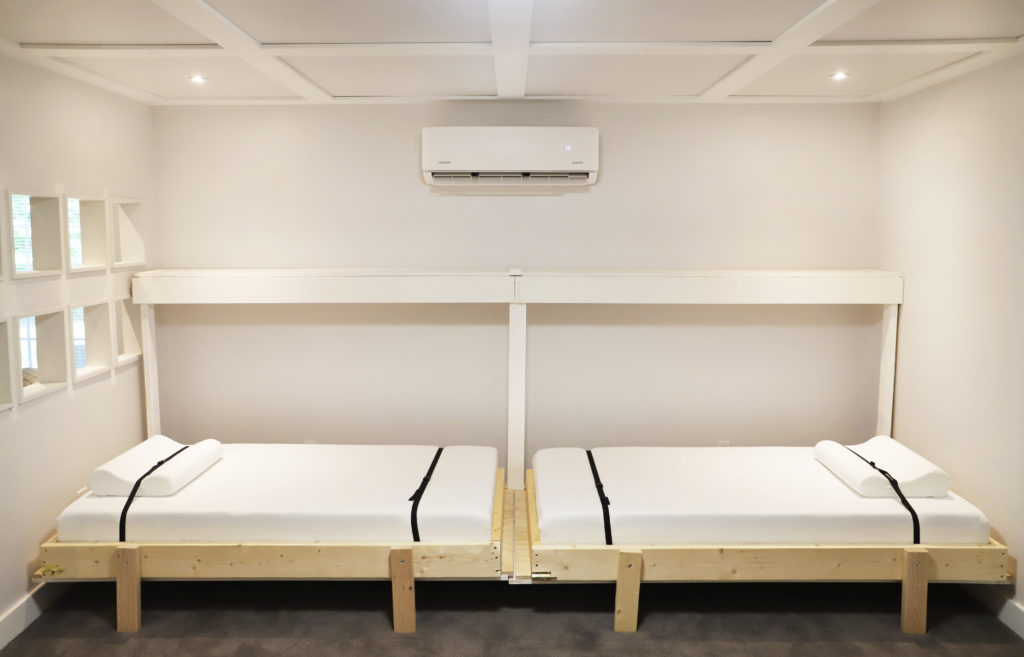
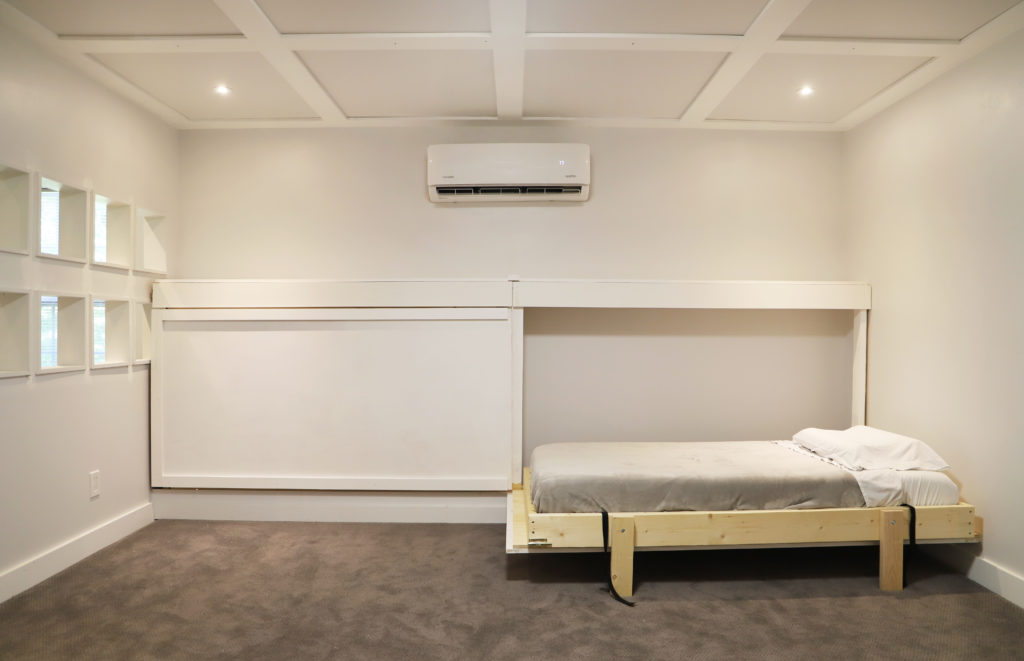
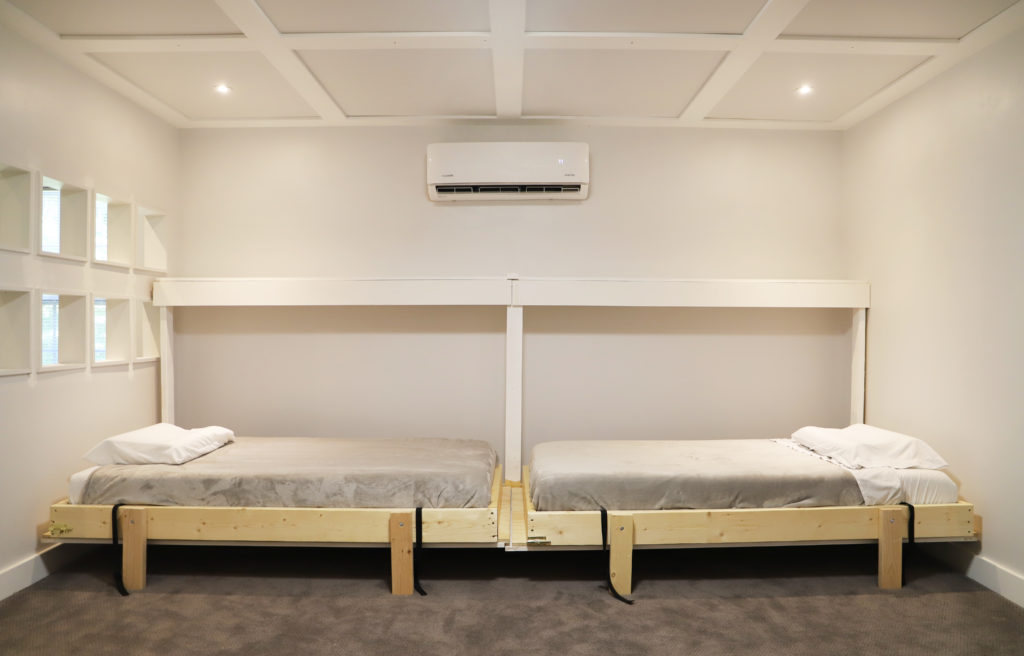
For this rec room in our basement, we did not have the height to position a bed vertically on the wall because of the mini-split a/c unit in the middle, but we still wanted to utilize as much space as possible. Ultimately, we decided to design a system to hold two (2) end-to-end, twin-sized beds on the horizontal plane. By placing two twin beds horizontally, we were able to have the space of a king, just chopped in half and positioned end-to-end.
Kit or No Kit?
We built our DIY Murphy beds using basic hardware store lumber, screws, hinges, and plywood. Not feeling so handy? There is a Murphy bed kit you can buy on Amazon that includes hardware, hydraulic pistons, legs, and even the cut sheets for wood. We opted to not purchase this kit because we would have needed two, and that would have blown our budget. Instead, we just used 6 door hinges, our own drawings and fittings, and some basic lumber.
Note: We will not include a detailed cut list for this DIY Murphy bed project because it was a true DIY. We had to a lot of customization for our specific space. We DO hope that the simple design and basic materials will inspire you to build your own!
Mattress Base
The foundation of this project is the base that holds the mattress (aka the mattress base). In a Murphy bed, these bases do double duty. While in use, the base acts as a box spring to support the mattress. When not in use and stored away on the wall, the bottom of the base is what will be visible in the room.
Before beginning this build, make sure you know the size of the mattress you plan to use. Not just the length and width, but also the height/thickness of the mattress.
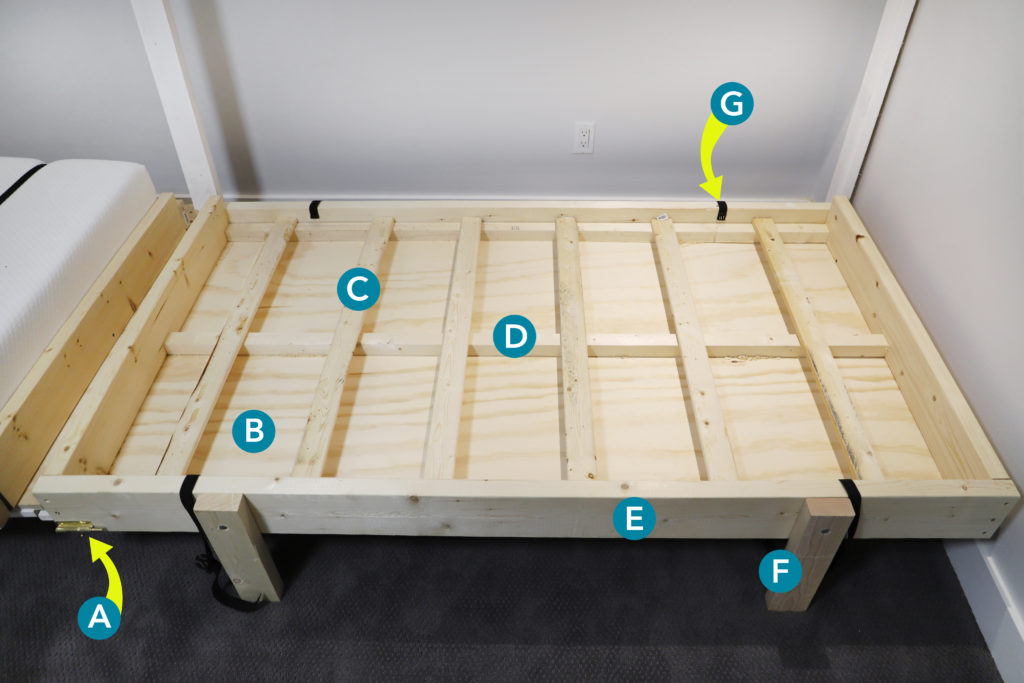
Here is a diagram labeled with all the finished parts to this base:
- A. Barrel latch to secure bed when not in use
- B. 3/4 inch plywood base
- C. 1×2 inch furring strips
- D. 2×2 inch center support (can cut a 2×4 in half)
- E. 2×6 inch base side rails
- F. 2×4 inch legs
- G. Elastic straps + buckle to secure bed to frame when closed
We started by building two of this mattress bases. Then, we were able to decide the height of the bed risers needed to support them from below.
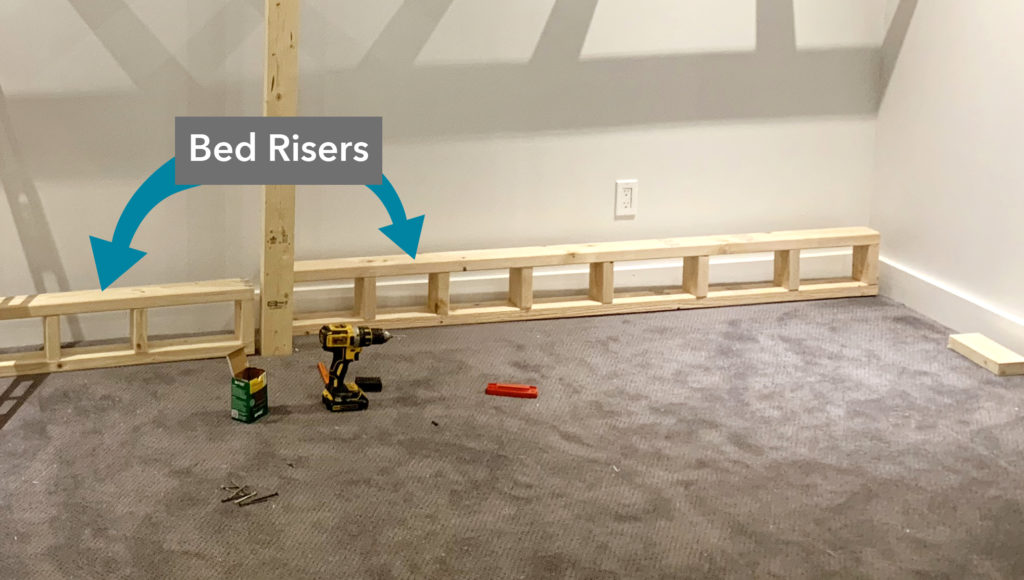
Bed Risers
The bed risers are the part of the Murphy bed construction that keeps the beds lifted off the floor. Bed risers are secured to the wall and then hinges are attached in order to lower and raise the mattress base.
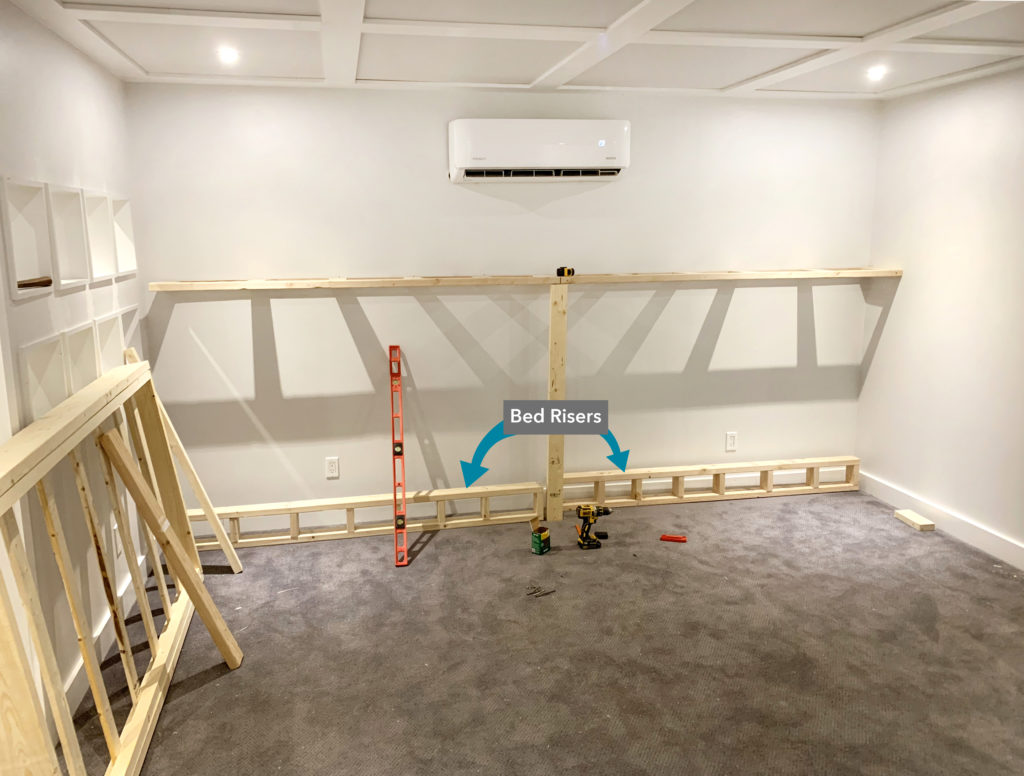
The height of these risers will depend on how high you want the bed to be off the floor. Don’t forget to include the height of the top of the mattress in this consideration! Ours are around 8″ tall.
The width of the bed risers will depend on the width of the bed, whether you are mounting to open vertically or horizontally, and the width of the wall in the room. In our case, we built two risers that are the same width as the mattress base.
Zooming in, the simple 2×4 wood construction is visible.
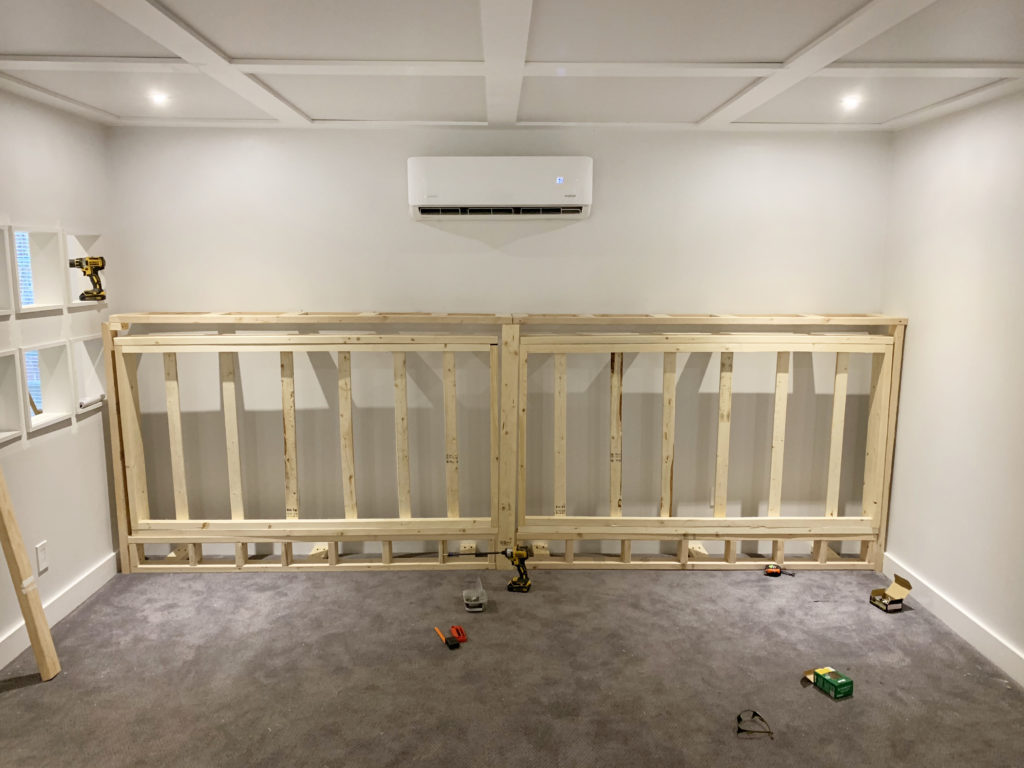
Top Shelf
Next, we added the top shelf, which serves a few purposes, both aesthetic and functional. Just like any Murphy bed, the top shelf provides the top cover for the unit. Because our bed is horizontal, it is at an accessible height (aka not at the ceiling), so we decided to make it usable when not in use, to hold drinks, photos, etc. It also serves as the top plate to which the swing flaps are attached (more on that below). And finally, it helps stabilize the entire unit, since we attached it to the wall studs.
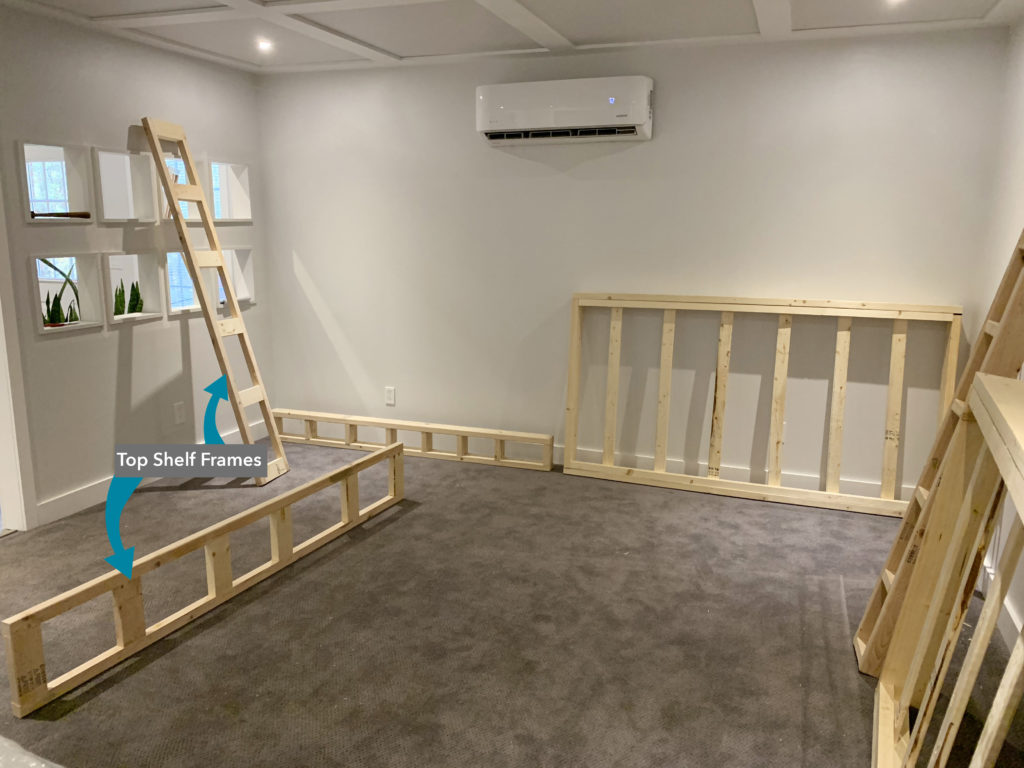
The top shelf frames are made from 2×4 studs for the center pieces and 2×4 studs ripped in half for the outside pieces. Our two piece are about as long as the wall, more on that below. We leveled them using a 4′ level and screwed these frames directly into studs in the wall.
NOTE: When measuring where on the wall to place the top shelf, dry fit the riser with the mattress base on top. Then, leave at least 4 inches between the top of the bed frames and the bottom of the shelf. This gap will allow us to add swing base legs later.
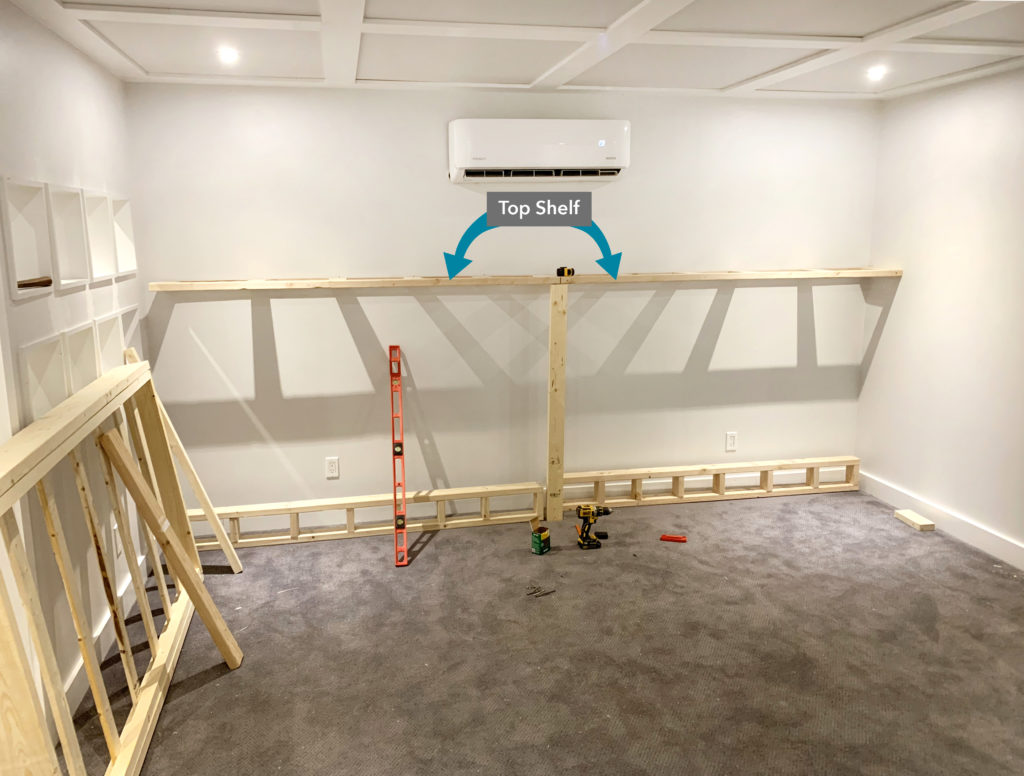
The two top shelf frame pieces won’t need to support a lot of weight, just enough to hold a piece of finish plywood on top to create the shelf and hinges for flap pieces that will cover the top of the bed frames.
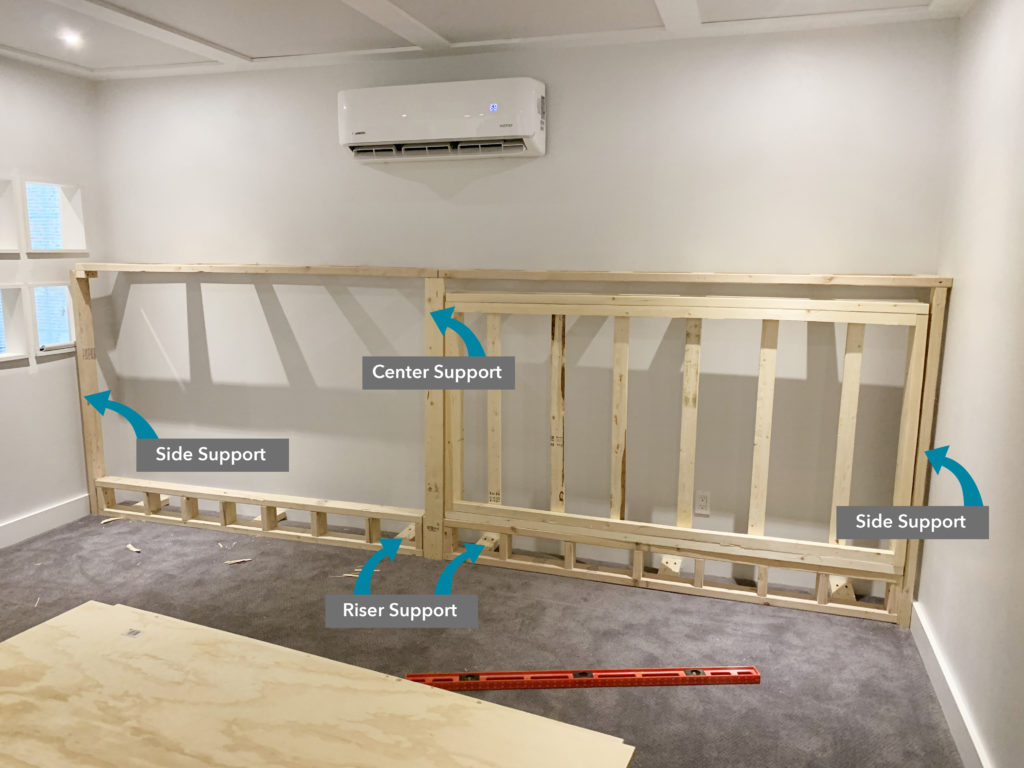
Side, Center, and Riser Supports + Hinges
We added three long 2x4s as side and center supports to connect the top shelf pieces to the floor and side walls. We say “long” because this measurement will be to the height of your shelf, which will depend on your setup. Ours are approximately 5′ tall. The side supports are next to the wall on either side of the unit, sandwiching the mattress bases. The center support goes right in between the mattress bases.
To add stability and help to prevent shifting when lowering and raising the beds with the hinges, we secured the bed risers to the wall behind them. We couldn’t easily screw the risers directly into the basement floor, so we used short 2×4 pieces and pocket screws to attach them to baseboards instead.
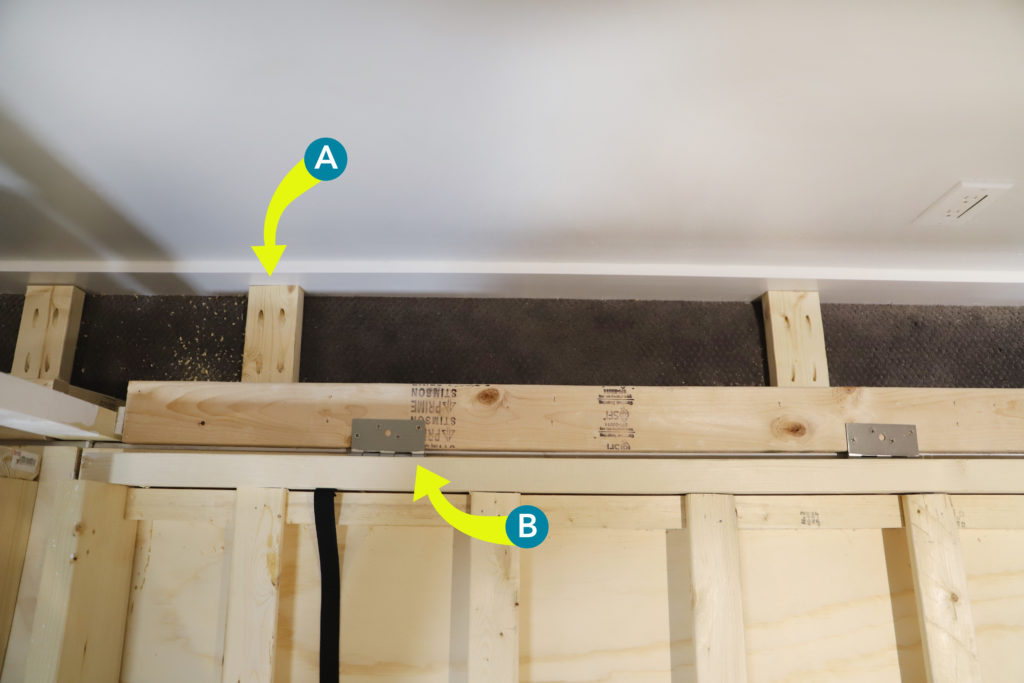
In this image, all the support pieces are labeled.
Once the mattress bases, risers, top shelf frames, and side/center supports are secured, you can attach the mattress frame to the bed risers using door hinges. We didn’t use anything fancy here, just heavy-duty door hinges work fine.
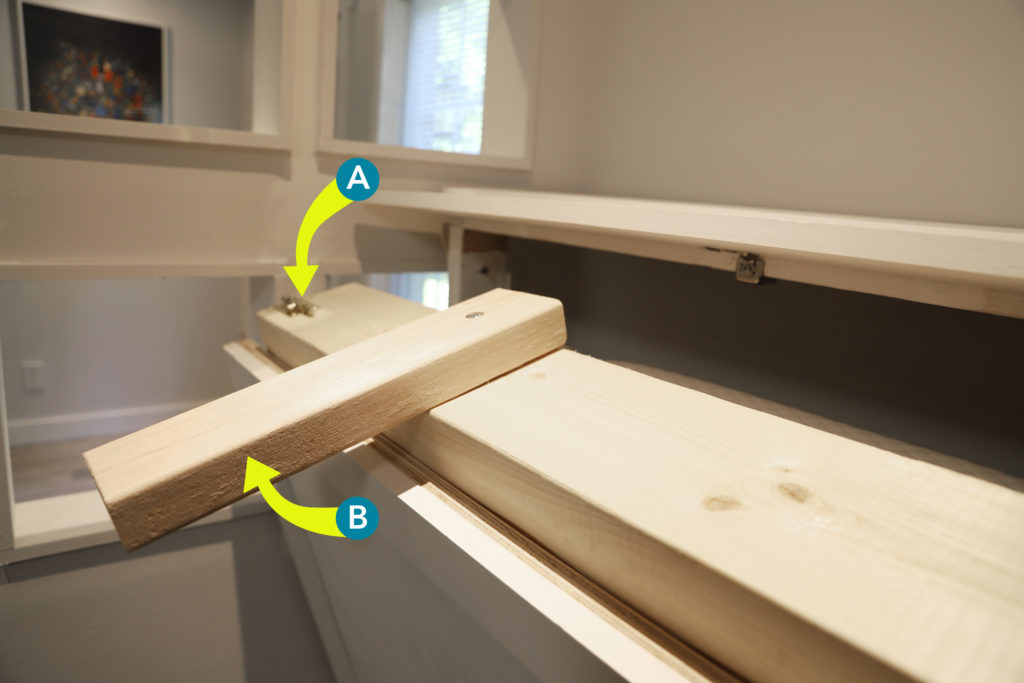
A) Another top view of the riser supports connecting the unit to the wall.
B) The placement of the hinges (3 hinges for each mattress base has worked for us) attached to the mattress base and the bed risers.
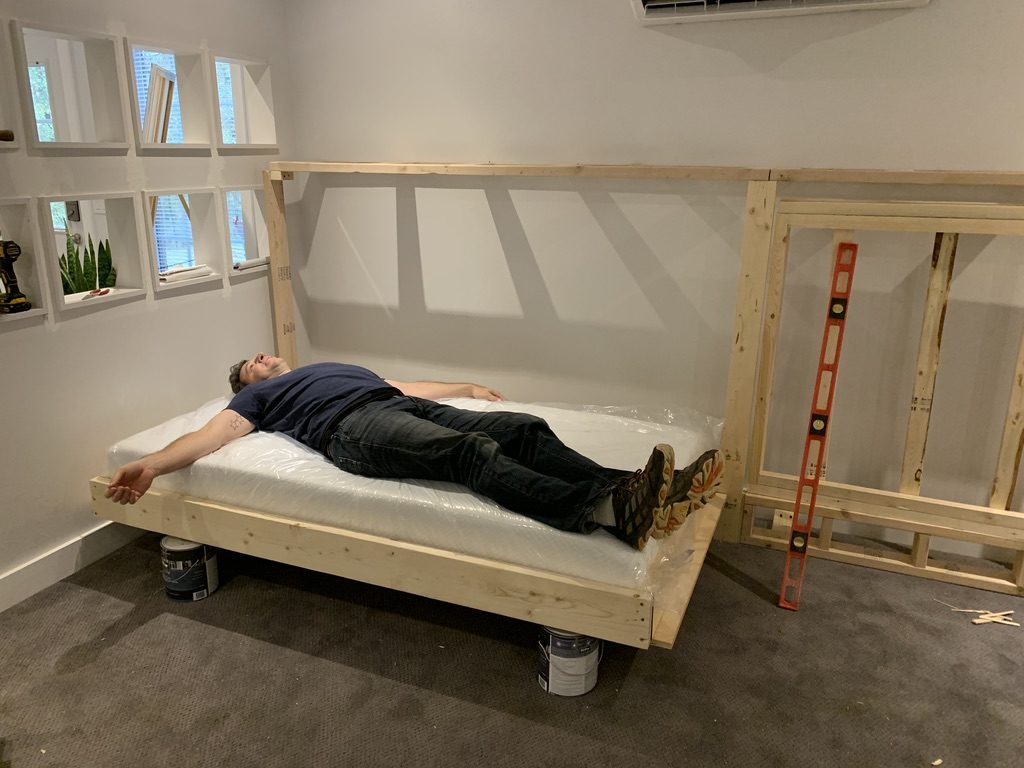
Chris took a little minute to check for certain that the beds “worked.” Spoiler – they do, even with paint cans for legs!
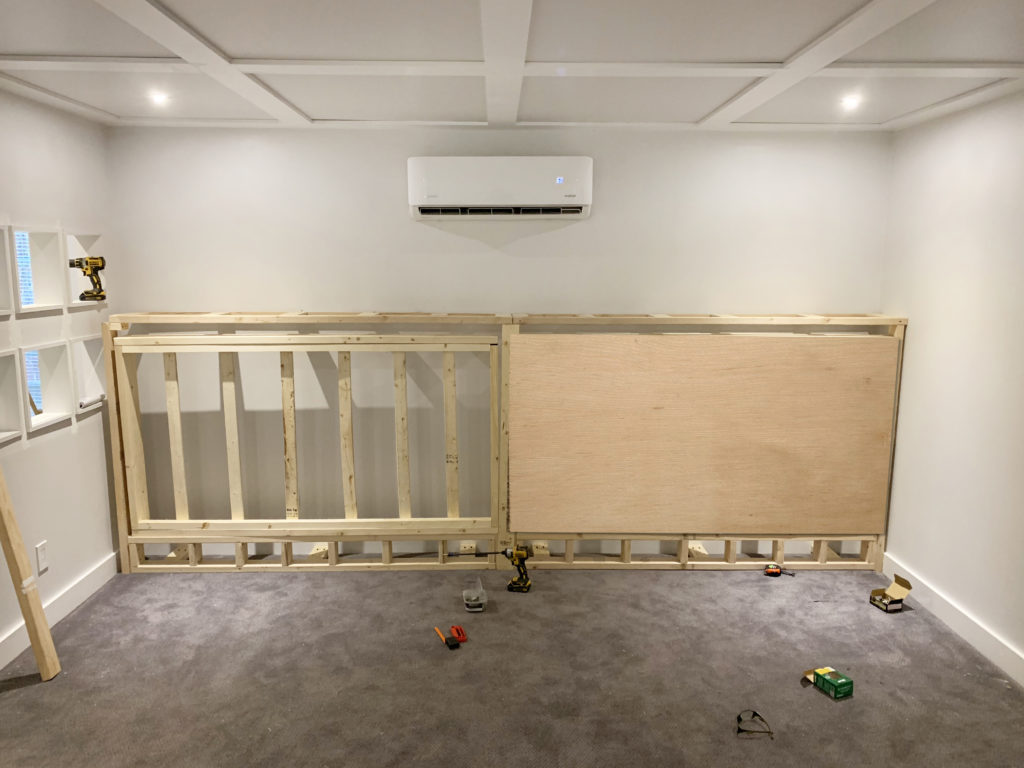
Finished Side
Once both sides of your DIY Murphy bed are roughed in and hinged together, you can begin working on the side visible when the beds are not in use: the “finished side.”
We added cabinet grade plywood to the bottom of each mattress base. Wood glue and finishing nails were used to attach.
Then, we lightly sanded and primed all the wood surfaces.

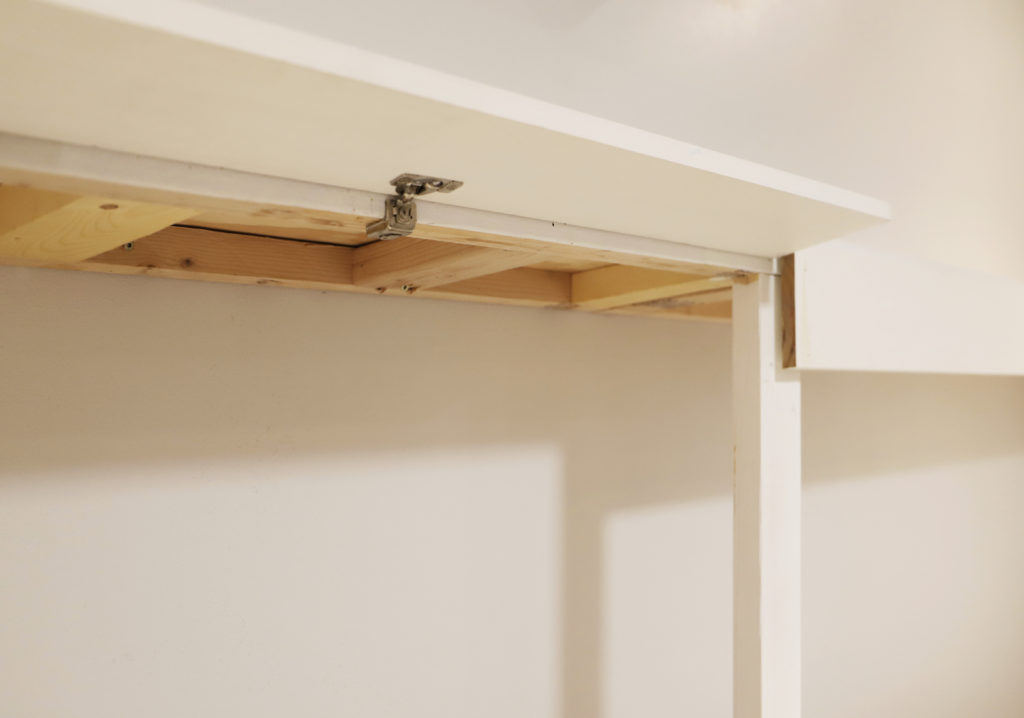
The top flaps were attached to the inside of the top shelves using soft close overlay cabinet hinges. This conceals the legs when not in use.
Legs & Latches
Next, the legs were attached. We needed 4 legs for this project – 2 for each bed – to support the front of the beds. The back of the beds are supported by the risers. The legs are made from simple 2×4 pieces of wood that are bolted to swing up for storage and down when in use. You are welcome to paint these or get fancier, but ours are much more utilitarian.
IMPORTANT: Safety latches need to be attached to each side of the Murphy bed unit. Latches are important safety features that prevent anyone (and especially any little one) from opening the unit and pulling the mattress down on themselves.
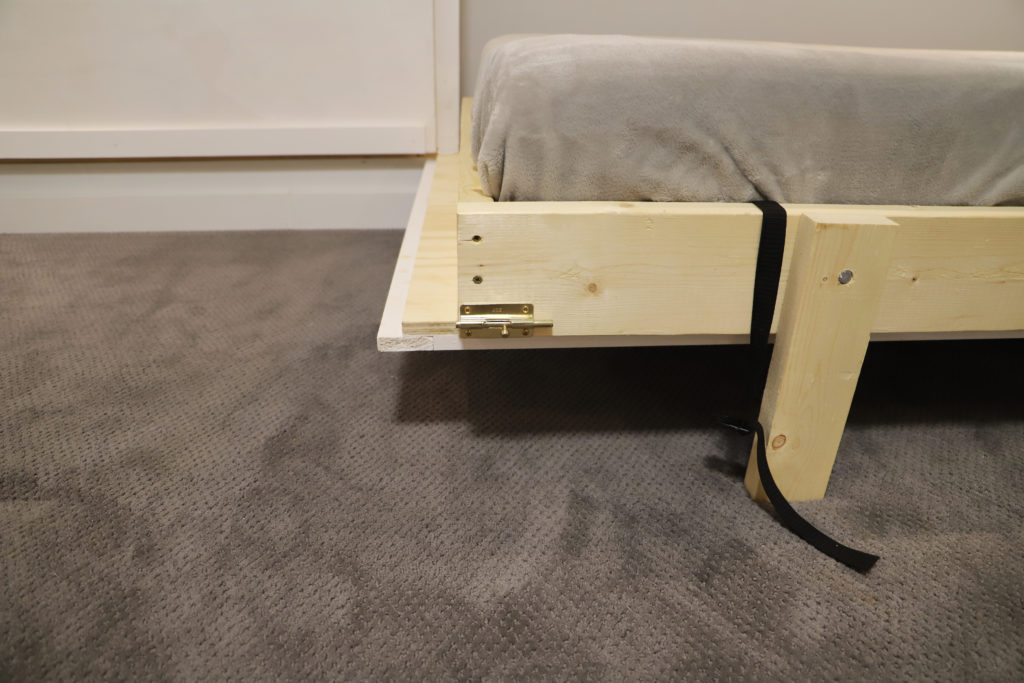
A) The barrel latch used to secure this side of the unit
B) The leg swung down into the sleeping position
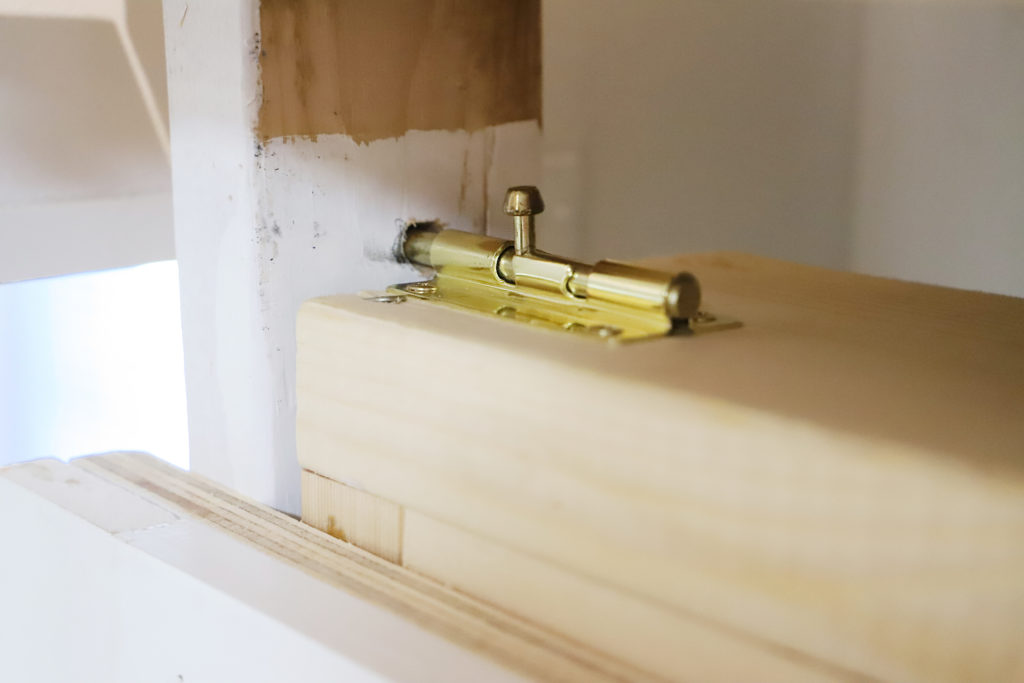
Here’s what the barrel latch looks like engaged. We just drilled a hold into the side support to engage the lock. The flap closes to conceal this section when the bed is not in use.
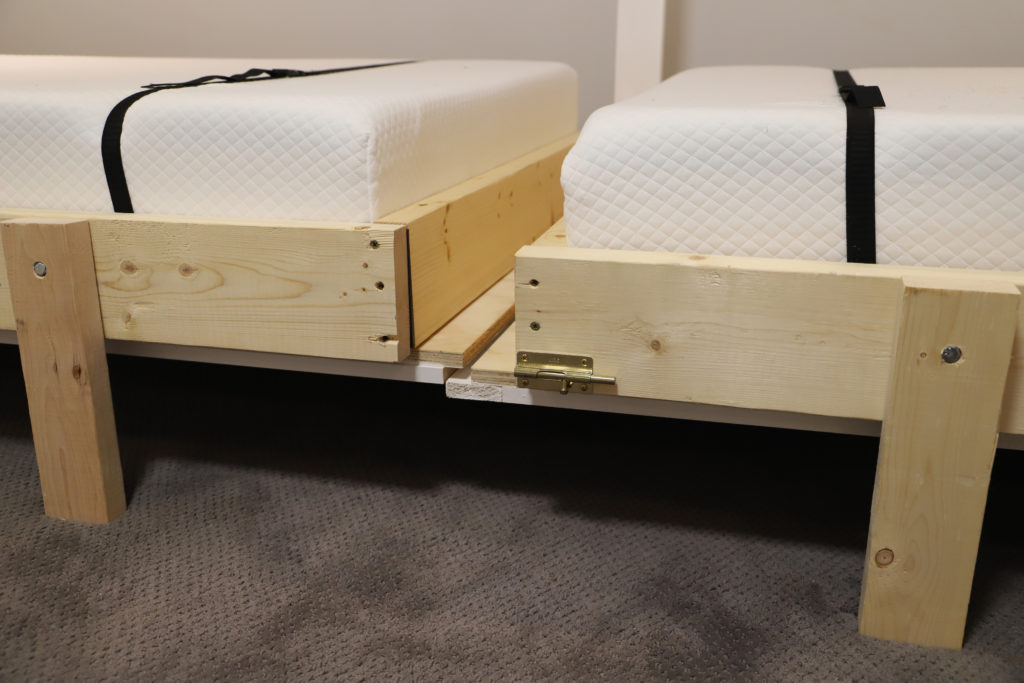
Here’s another view of the leg engaged on the right bed and you can see the latch as well.
Here’s a quick close-up of how the beds meet together in the middle.
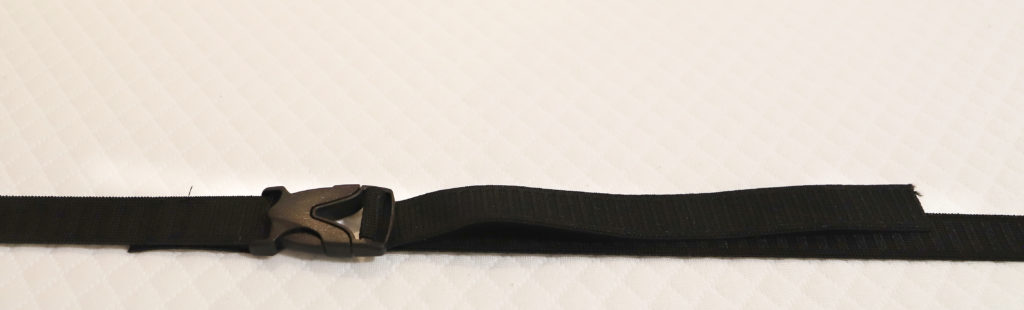
We also added some elastic webbing to keep the bed and/or pillows from falling back into the open cavity behind the bed. The webbing was cut to length and a plastic buckle attached. We stapled the webbing to the inside edge of the mattress base.
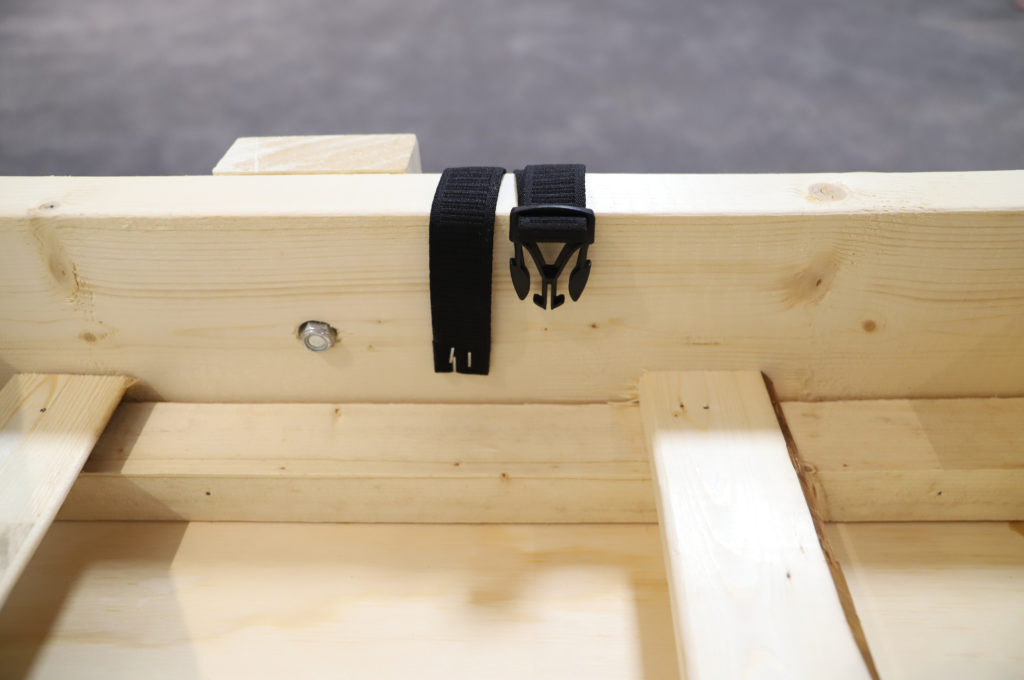
It buckles together when you’re ready to store the bed.
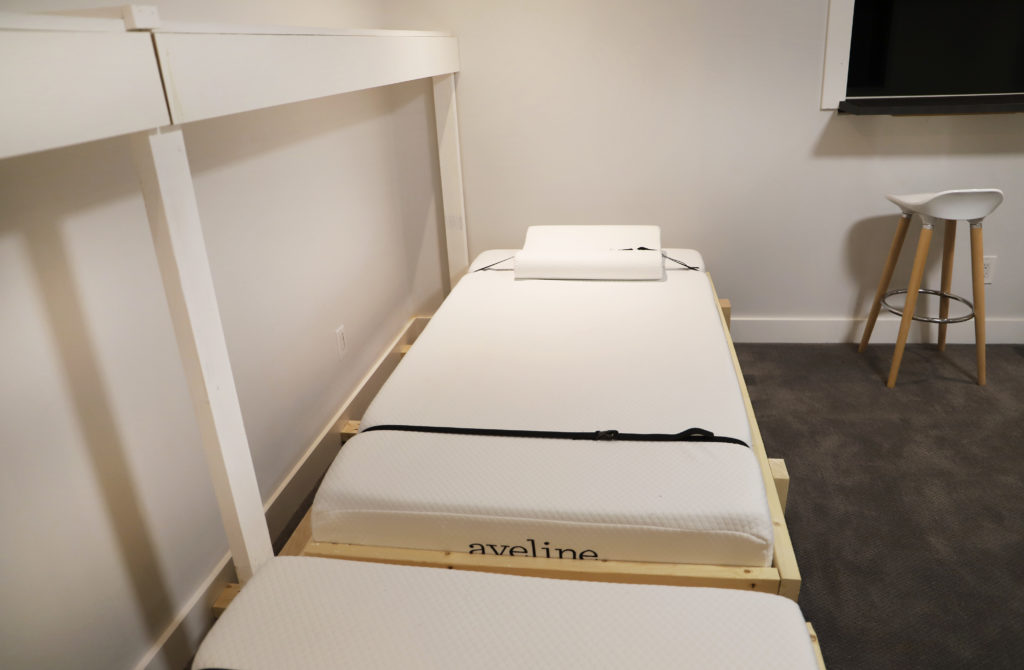
Finished Product!
We painted the plywood to match our other trim colors and added some simple wood trim on the painted surface. Afterward, as the finishing touch, we added a simple plywood kick board below the mattress base so it appears uniform on the wall when stowed.
INSPIRED?!! Build your own version of this DIY Murphy bed for your space! Oh and….The twin mattresses we use in this project (which are super comfy and inexpensive) are from here: https://amzn.to/2O79N9I
If you found this post useful and inspiring, save THIS PIN to your Furniture Projects board on Pinterest.
More basement projects can be found here and here!
Lastly, thanks to Toni and Chris for the inspiration for this project!

This is the first Murphy bed idea that seems doable !!
Fabby tutorial. Well done. Thanks for sharing .💖