Since we last updated you on our Finished Room Over the Garage (FROG) project, we have insulated the floors, insulated the ceiling, and made a LOT of progress towards completing this project. In this post, we’ll share how we insulated the room over the garage, kept air flowing from soffit to ridge vent, added vapor barriers, and confused our Border Collies (just checking to make sure you’re paying attention). VIDEO clip included!
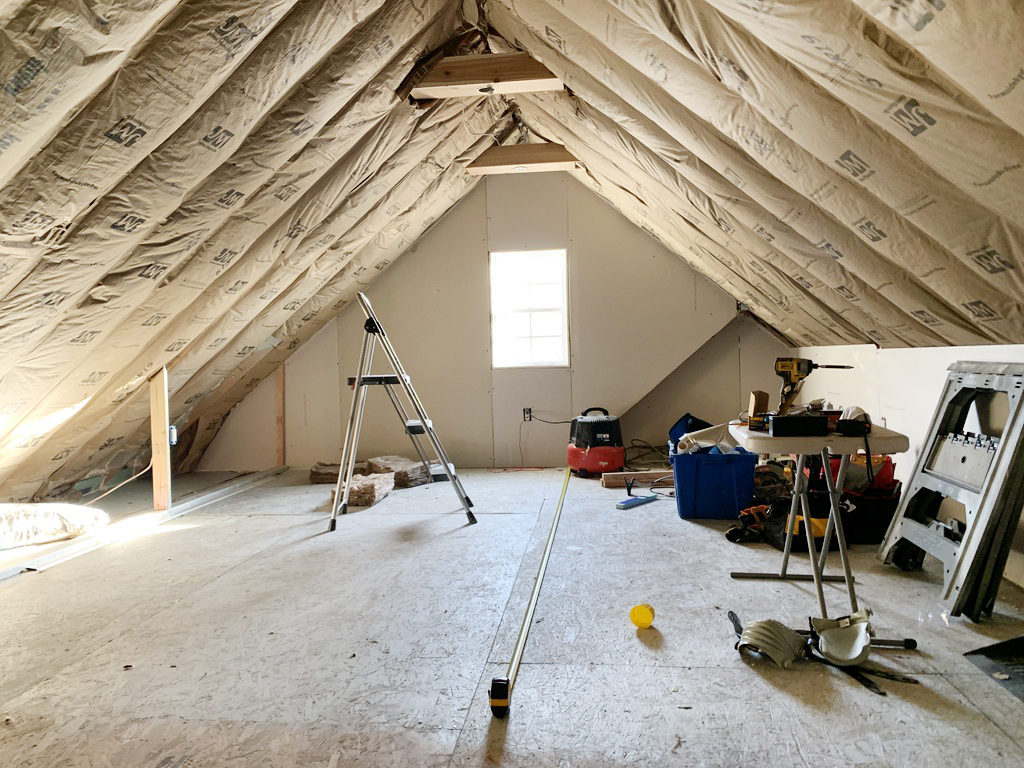
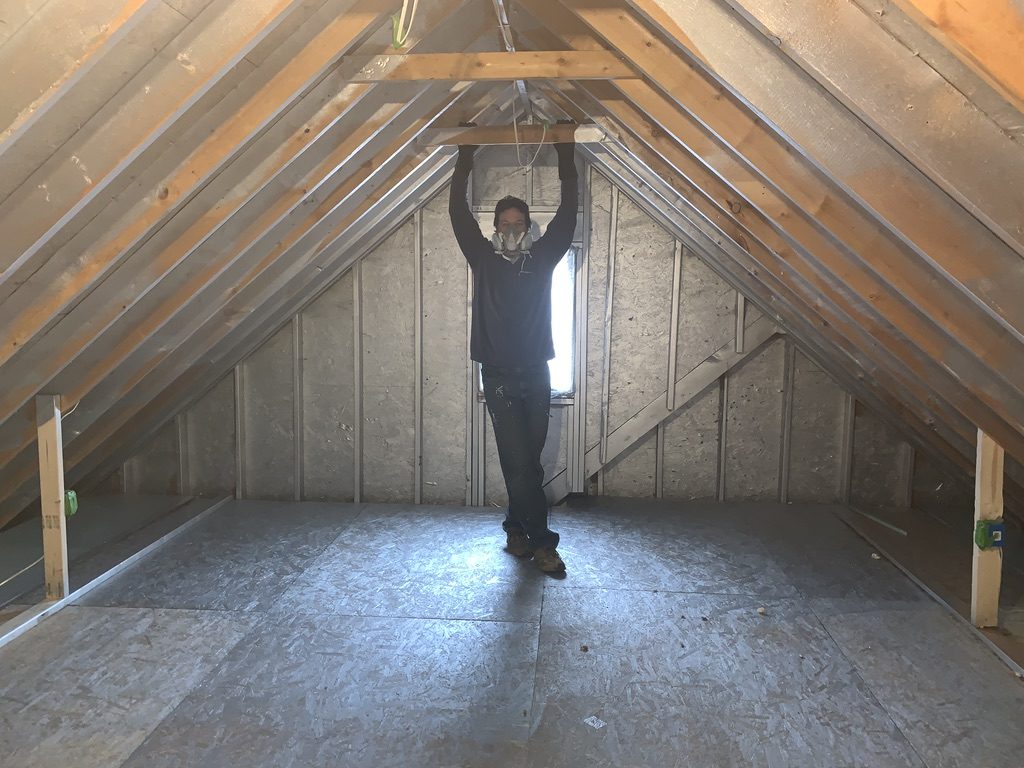
We’ve come a long way so far! But admittedly, finishing the room over the garage, has been one of the most difficult projects we have done to date. The open attic was truly hard to envision as a finished space and even more difficult to transform into usable space.
Here’s a quick video clip on the decisions we made insulating the room over the garage. And here’s the link, for those viewing this from our emails: https://www.youtube.com/watch?v=RsmWrJWJniY
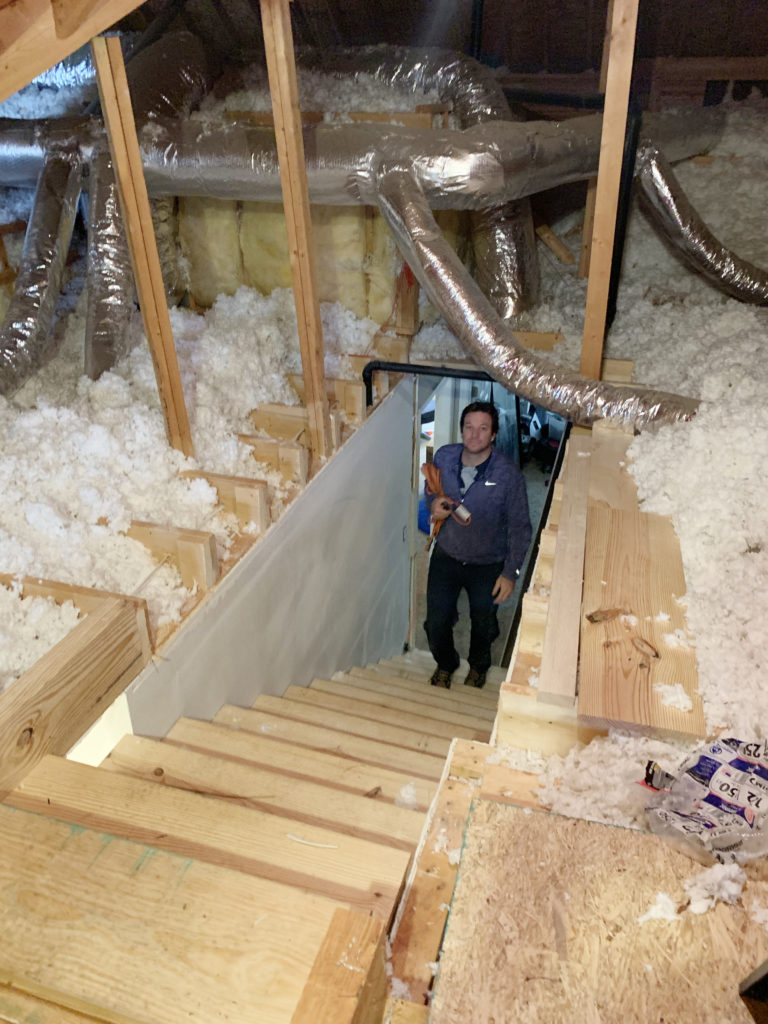
As you may recall, we hired a contractor to help build the non-existent stairs to the attic area. Before these glorious beauties were built, we had to climb a rickety set of pull-down attic stairs, perform slow-motion hurdles over the massive A/C handler in the attic, step one rafter at a time waaaaaay over to the opposite side of the house, and then try to carefully measure our options as microscopic insulation particles filled up our lungs.
Ahhh. The good ‘ol days! Ha!
When we started this project, the weather was super cold, but as it does in the south, soon it would turn wicked hot. So, we set our sights on insulating the space and making it livable. Melissa did some more research (her unofficial favorite pastime) searching for the least expensive and most effective ways to insulate this former attic.
Floor Insulation
We began the construction by insulating the space between the garage below us and the new sub-floor we were installing. Because the new attic space was directly over our garage, we needed a sealed space (to protect against carbon monoxide). We were also on top of a non-conditioned space, so needed to insulate heavily. We installed layers of rigid foam, then batting insulation between the new floor joists we installed, and finally, 3/4″ tongue and groove sub-floor on top.
Wall and Ceiling Insulation Options
We were initially drawn to spray foam insulation, since we’d read a lot about super insulated homes and their incredible energy efficiency. Spray foam, which can be professionally or DIY-installed using kits, is a good choice in attics if you’re planning to do the entire attic and you’re okay with stopping air flow from entering/leaving the envelope. Spray foam is an excellent insulator, but can be pricey, even for small DIY kits. However, we soon realized that we weren’t going to spray the entire attic and needed to maintain the air flow.
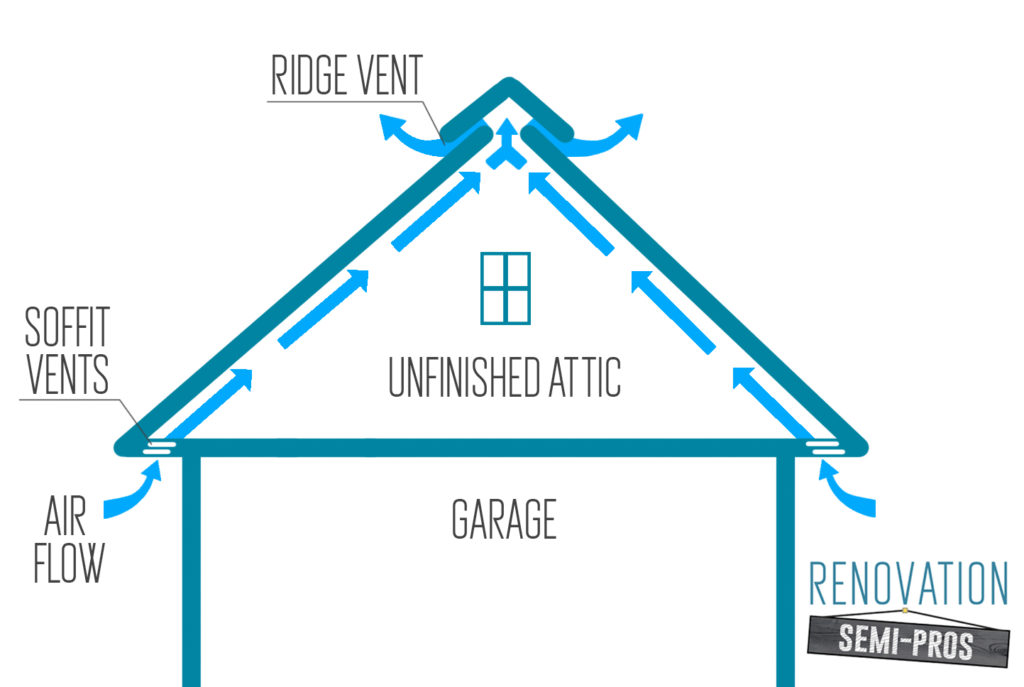
A ridge vent and soffits facilitate air flow. The house already has soffit vents that encourage air to flow up into the attic. Then, the ridge vent allows hot air to escape at the roof ridge. To keep the air flowing, and to prevent moisture from accumulating, we decided to leave space behind the walls and ceiling of the finished space (more on that below).
Heat Transfer & Insulation
Heat is transferred in three ways: convection, conduction, and radiation. Convection describes heat moving through liquid or gas (like a pot boiling on a stove). Conduction describes the process of heat moving through solid objects (like the pot’s hot lid). Radiation describes how heat travels via electromagnetic waves in an empty space (like how you can feel heat from the stove’s element without touching it).
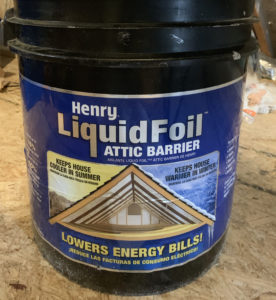
Thermal insulation, like pink fiberglass batting, spray foam, or rigid foam, primarily address conductive heat transfer. Rigid foam also addresses convective heat transfer, primarily via moisture, since it serves as a vapor barrier. Finally, to address radiative insulation, we researched foil options. Often used in attics, foil barriers are DIY-able, but kind of a pain to install. Melissa found a spray on foil replacement manufactured by Henry, called LiquidFoil Attic Barrier. It’s a goopy metallic liquid you spray onto the underside of wood roof decking and rafters to help reflect solar radiation. Considering it blocks up to 84% of radiation heat, was less expensive that traditional foil sheets, and was FAR easier to install, we purchased a 5-gallon bucket (around $200).
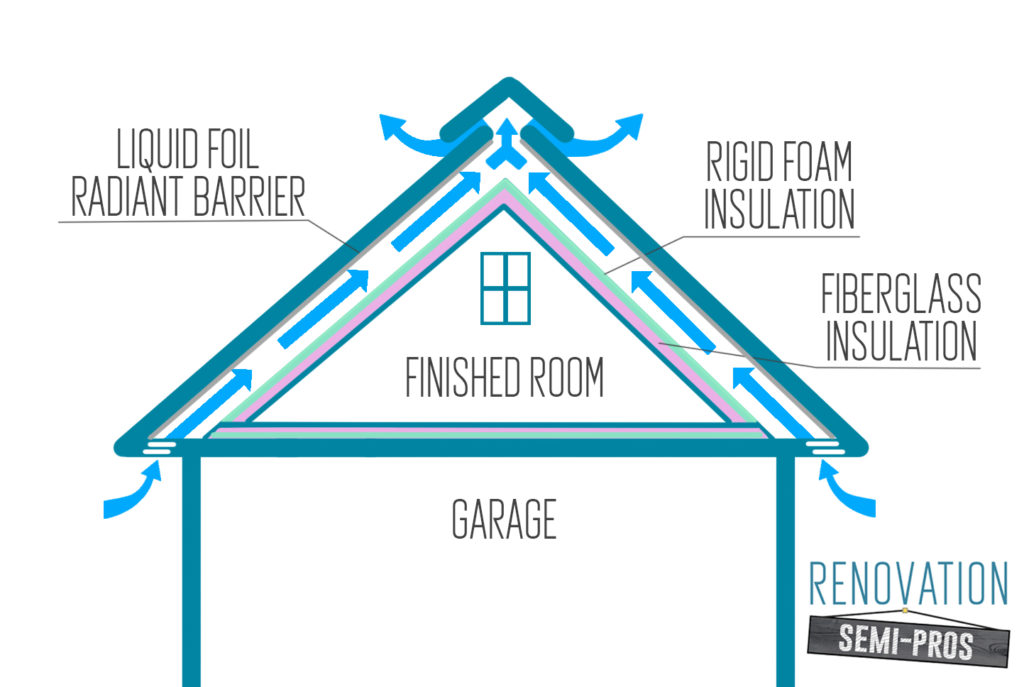
Layered Insulation for the Ceiling & Walls
We ended up crafting an insulation sandwich of sorts, with all of our layers:
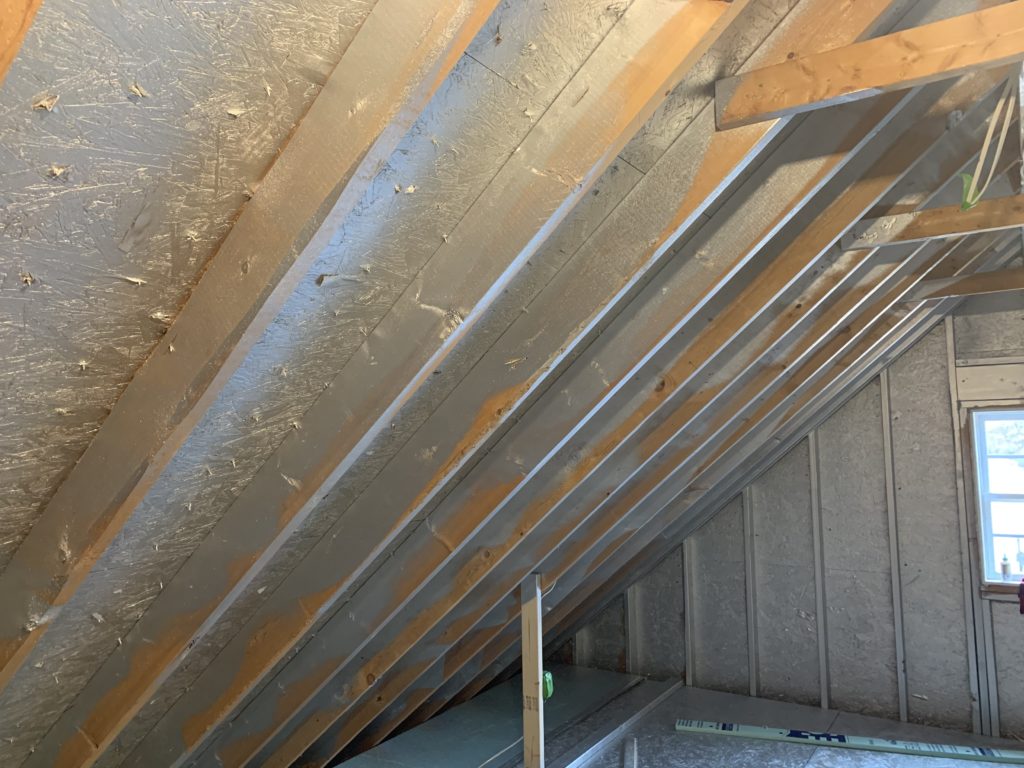
- LiquidFoil on the roof decking and all rafters
- Baffles to allow air flow to continue flowing from soffit to ridge vent
- 1 inch rigid foam boards over the baffles
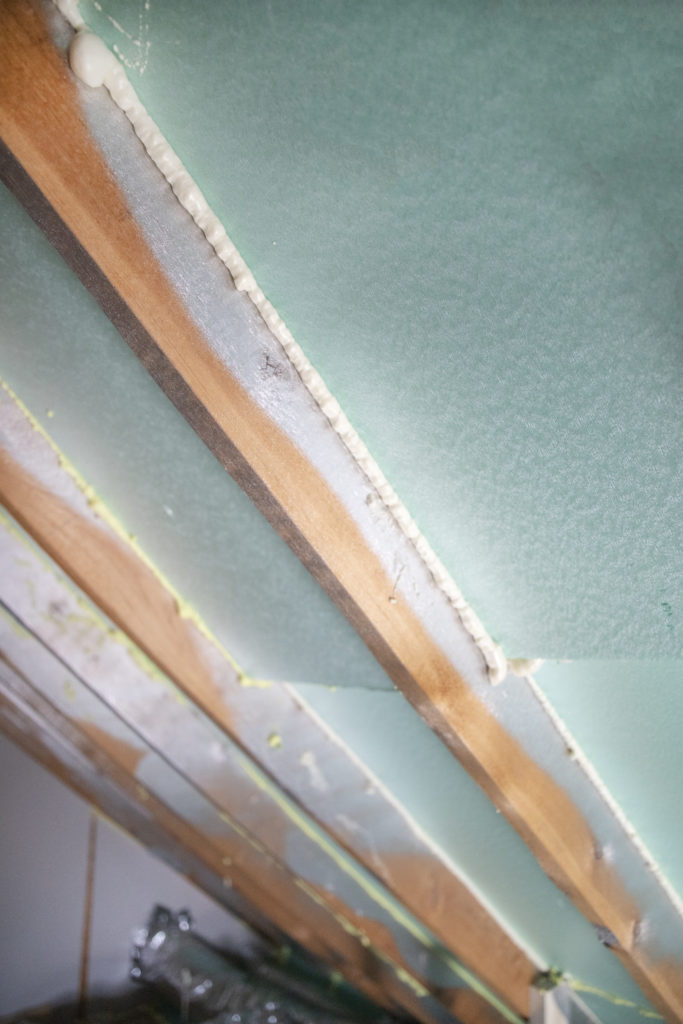
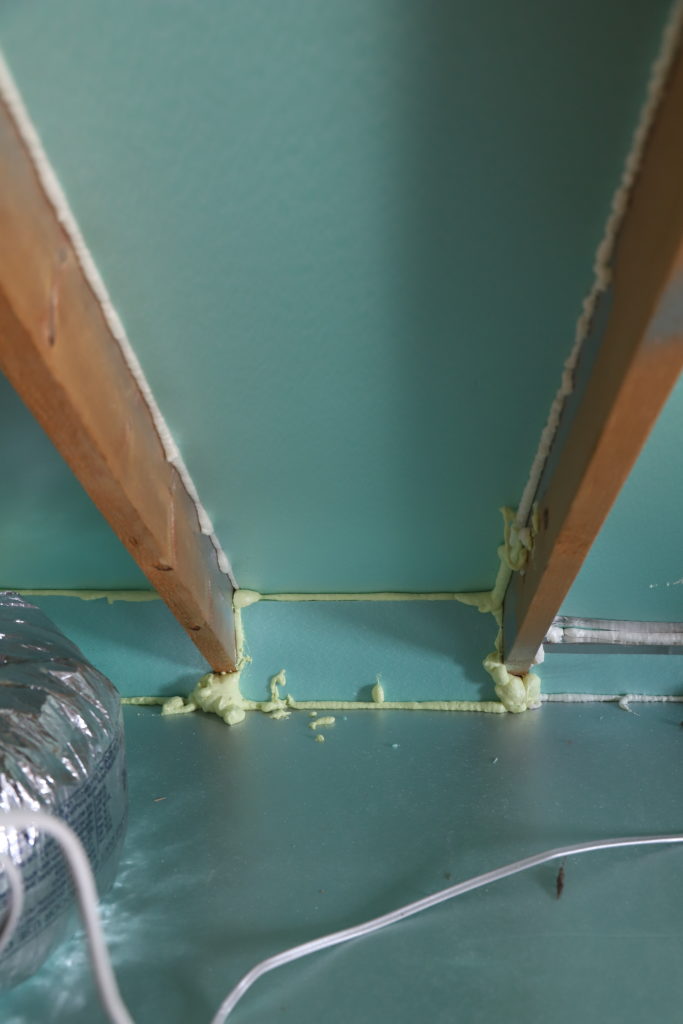
- Canned Spray Foam for all the seams
- R-19 Formaldehyde-free, Fiberglass Batt Insulation between rafters
This diagram shows the final insulation strategy. Pink is the fiberglass insulation, green is the 1″ rigid foam insulation, the silver is the radiant barrier, and between those layers, the air flow can still be seen moving from soffit vent to ridge vent.
Liquid Foil Application
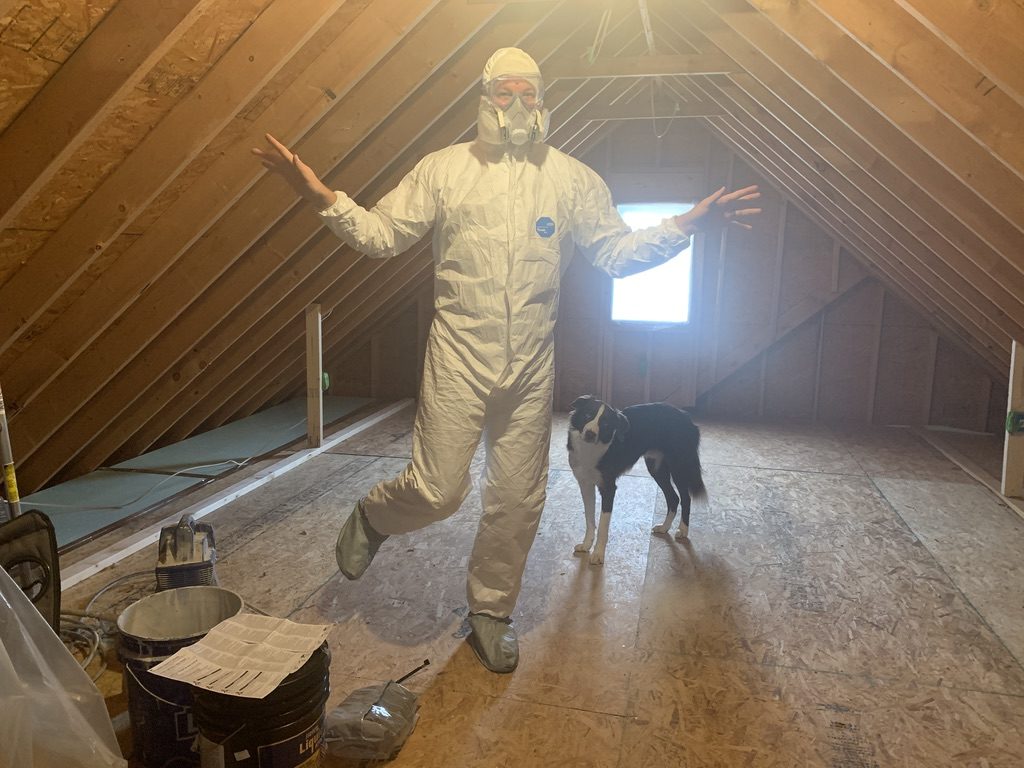
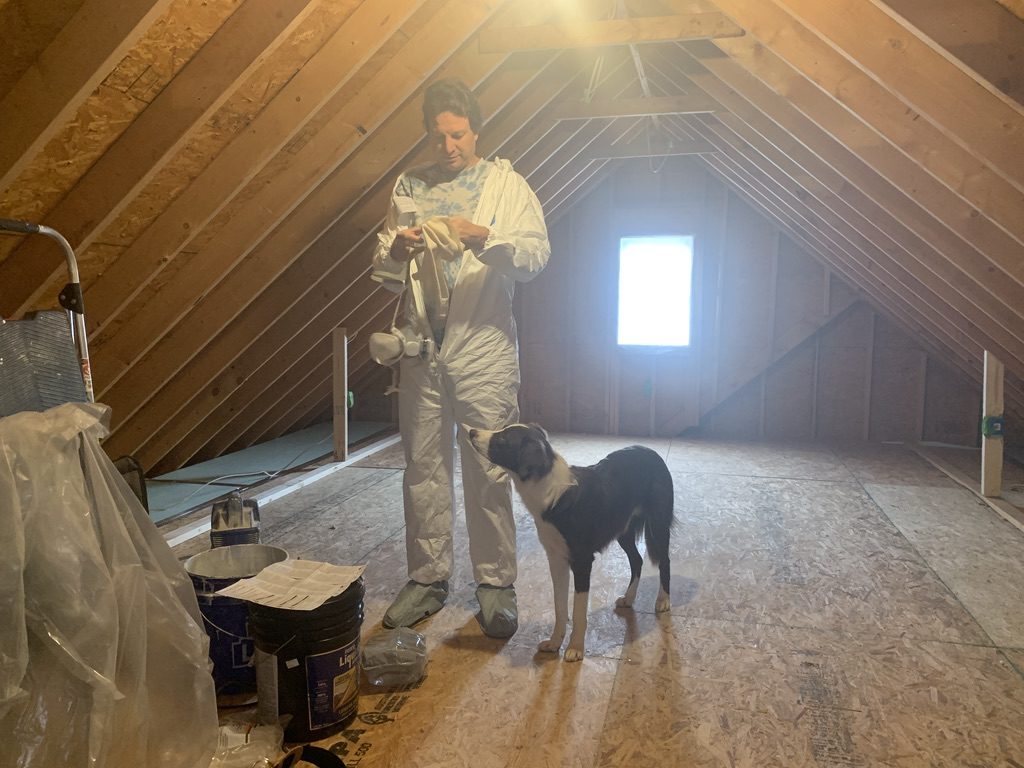
Okay, Chris. Time to suit up and get to spraying! !
Make sure to use goggles and a respirator! You don’t want fine paint particulate in your lungs!
Here’s the after – silver walls (and ermmm floor, cause Chris went a little overboard)!
Rigid Foam Installation
To create a ventilation gap and keep the air flowing, we used what we had, rather than buying baffles. We placed long strips of scrap rigid foam alongside the rafters. Most stuck right onto the nails sticking through the roof decking, some required a few finish nails from the nail gun.
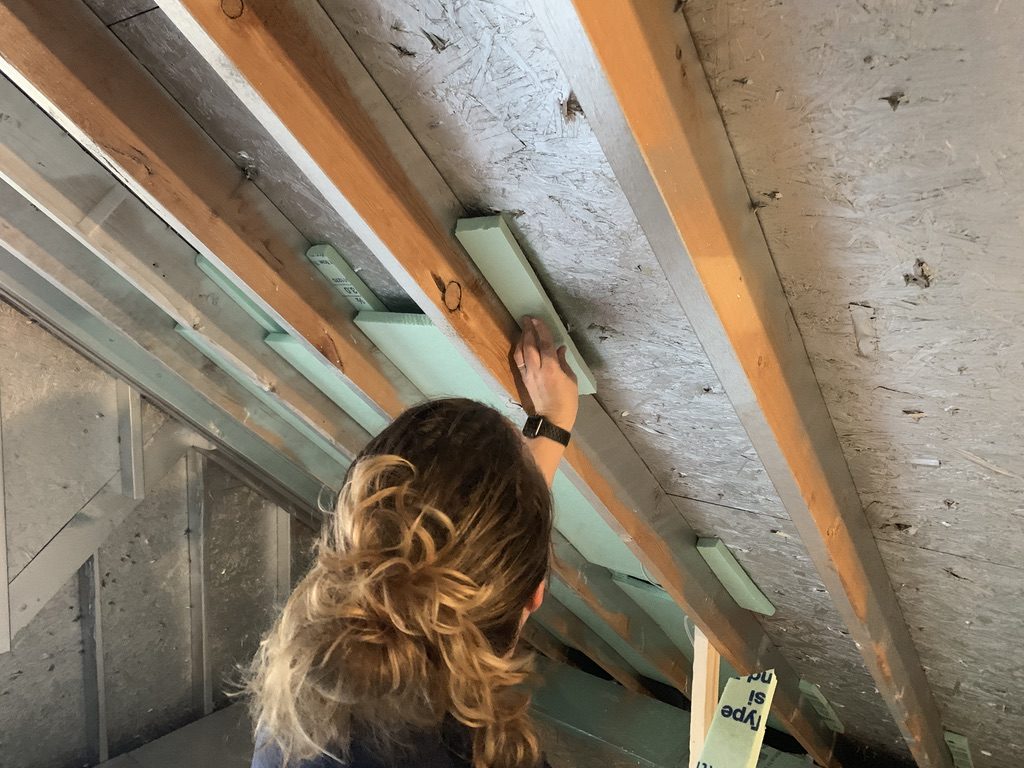
After make-shift baffles were in place, we fit foam pieces between the rafters. The baffle strips acted like a cushion and prevented the larger pieces of foam from pushing up against the plywood.
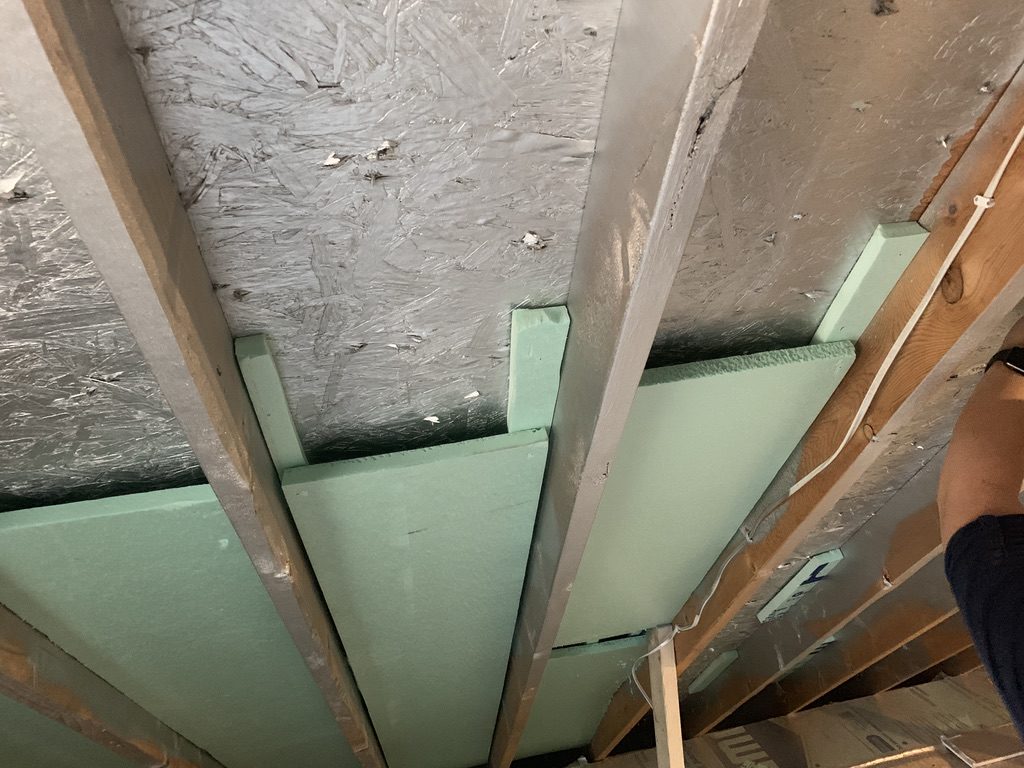
As you see, we purposely cut the ridge foam sheets about 1/2″ narrower than the space between the rafters measured. This way, we a had a small gap on both sides to add insulation spray foam sealant.
The foam spray will keep the rigid foam in place and provide a sealed air-barrier.
Air should be able to travel up from the soffits, behind the rigid foam…..
….and out through the ridge vent without leaking into the new finished space.
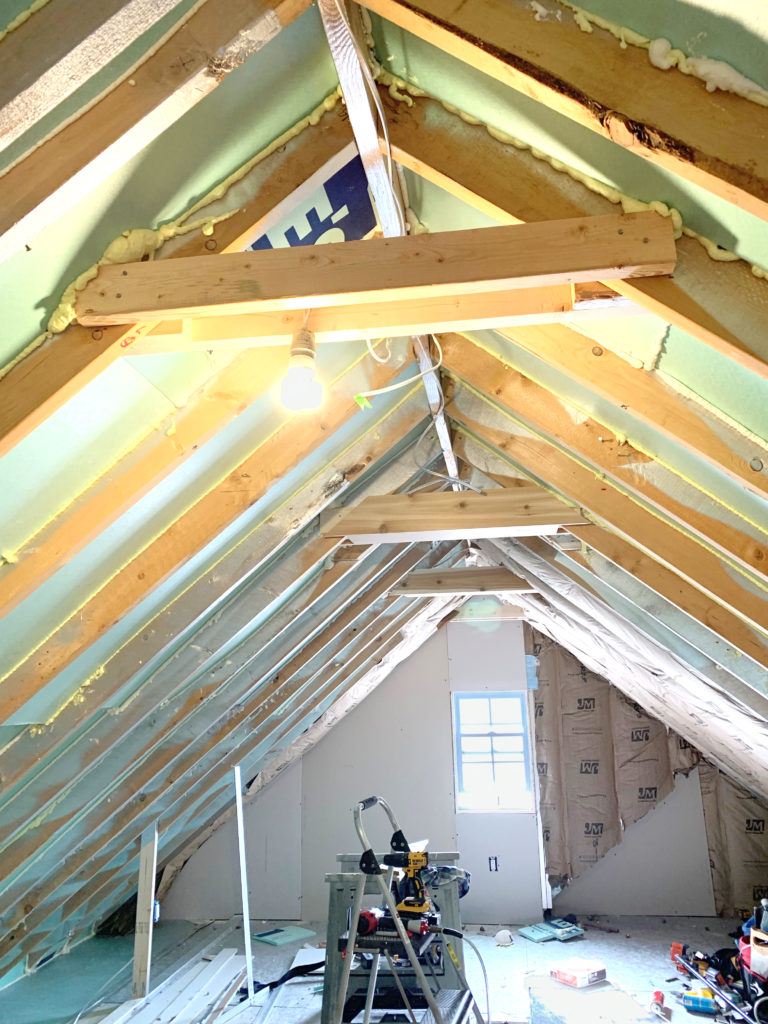
Fiberglass Batting Installation
Next, we added R-19 faced fiberglass insulation over the rigid foam. The 1 inch rigid foam has an R-5 value. All told, with the roof shingles, wrap, plywood roof decking, air gap, rigid foam, fiberglass batting, and the eventual interior finish layer, combined with the reflective value of the spray foil, our R value is approximately 42. Nerding out!
Considering the attic roof was constructed, the money we were willing to invest, and the level of imagination our brains were capable of at the time, we did our best to insulate the room over the garage. In hindsight, we may have added 1/4 inch foam along the rafters to prevent thermal bridging or heat being transferred through each rafter.
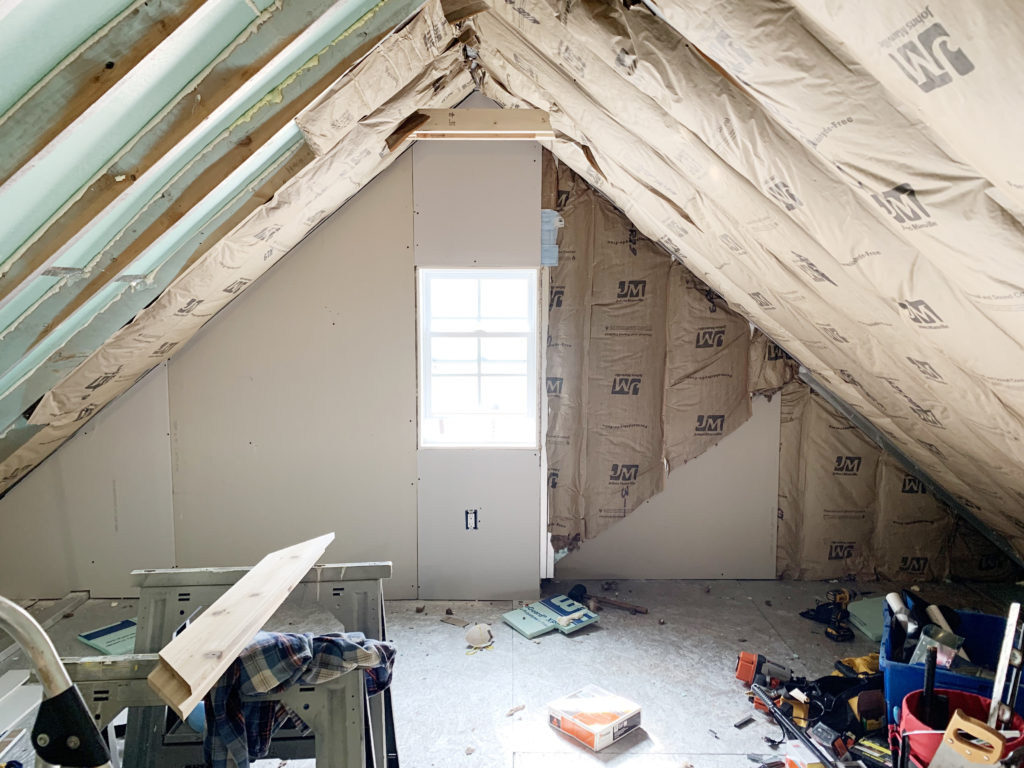
Still to come….finishing the walls, ceilings, custom light fixtures, and DIY flooring!


Hello! Just curious what type of sprayer you used in order to install the liquid foil barrier? Thanks for this guide I have found it extremely helpful.
How did you secure the BATTs to the foam board?
Hi Roberto – we used the ‘face-staple’ technique and attached the insulation to the rafters on the ceiling. The foam boards were independent. So our layers from the inside were: the rood decking, sprayed-on Liquid Foil, foam baffles, rigid foam (with sprayed foam edges), and then the paper-backed insulation. Hope that helps!
Hi there.
For your attic project, did you put plastic over the R-19 insulation? Have you had any moisture or condensation?
Thanks for the thoughts. Nice article and pictures and video.
Douglas.
Hi Chris and Melissa! I was wondering, how the attic was holding up as far as being able to keep heat and cool air inside?
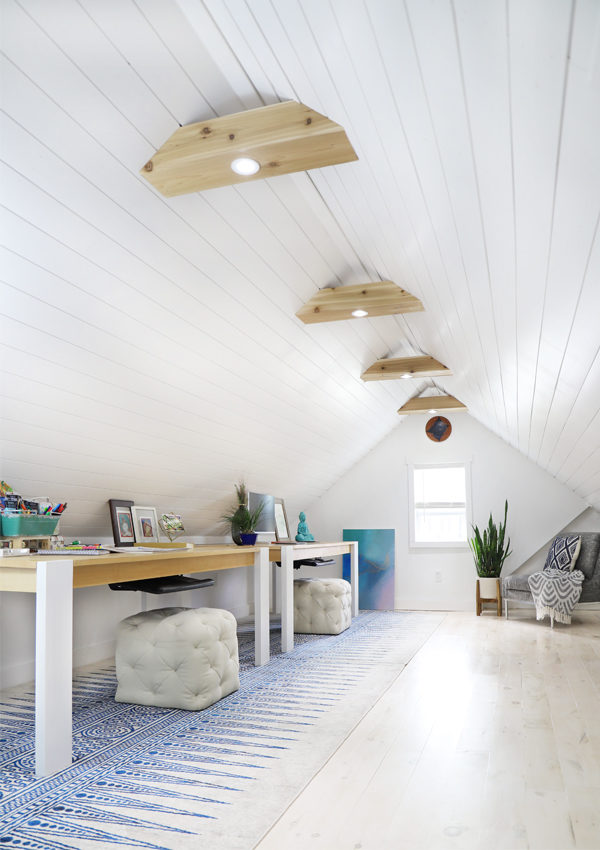
Hello, I have been using your attic remodel as a guide and inspiration for our loft remodel. I would also like to do the exposed beams with the recessed lighting in the center, but I am having troubles finding the correct size and set up to mount into the beams. Every time I go to the store they say, “that set won’t work because it’s meant for drywall.” Do you remember what recessed lighting you purchase? Any help would be greatly appreciated!
Thank you in advance! 🙂
Hi Kelly! Thank you for your comment — and a great reminder that we should have linked to the lights in this post. Check out the post on the cedar beams and shiplap. It has a link to the lights we bought on Amazon for this project (and used in the basement project too). https://renosemipros.com/attic-office-shiplap-ceiling-cedar-beams-are-done/ and go to the section called “Ceiling Cedar Beams.” We had some trouble finding what we wanted in stores too, but these recessed lights are rated to come into contact with combustible material, so they are great for these types of projects. And they are SUPER easy to install (soooo easy). The cedar we used was 3/4″ thick, so these lights fit in drywall of the same thickness too. Best of luck on your loft remodel!