This is one of those posts we’ve been ‘meaning’ to share. With all that’s been going on with the basement media room, basement office, and our gardens, it kept getting pushed to the back burner. That said, we are excited to share DIY custom shutters!
In this post, we’ll give you step-by-step directions to build your own designer-inspired, DIY custom shutters. Not just simple run-of-the-mill shutters, but ones that inspire you to push the limits of conventional design.
Or – Scroll to the bottom for lots of finished shutter designs!
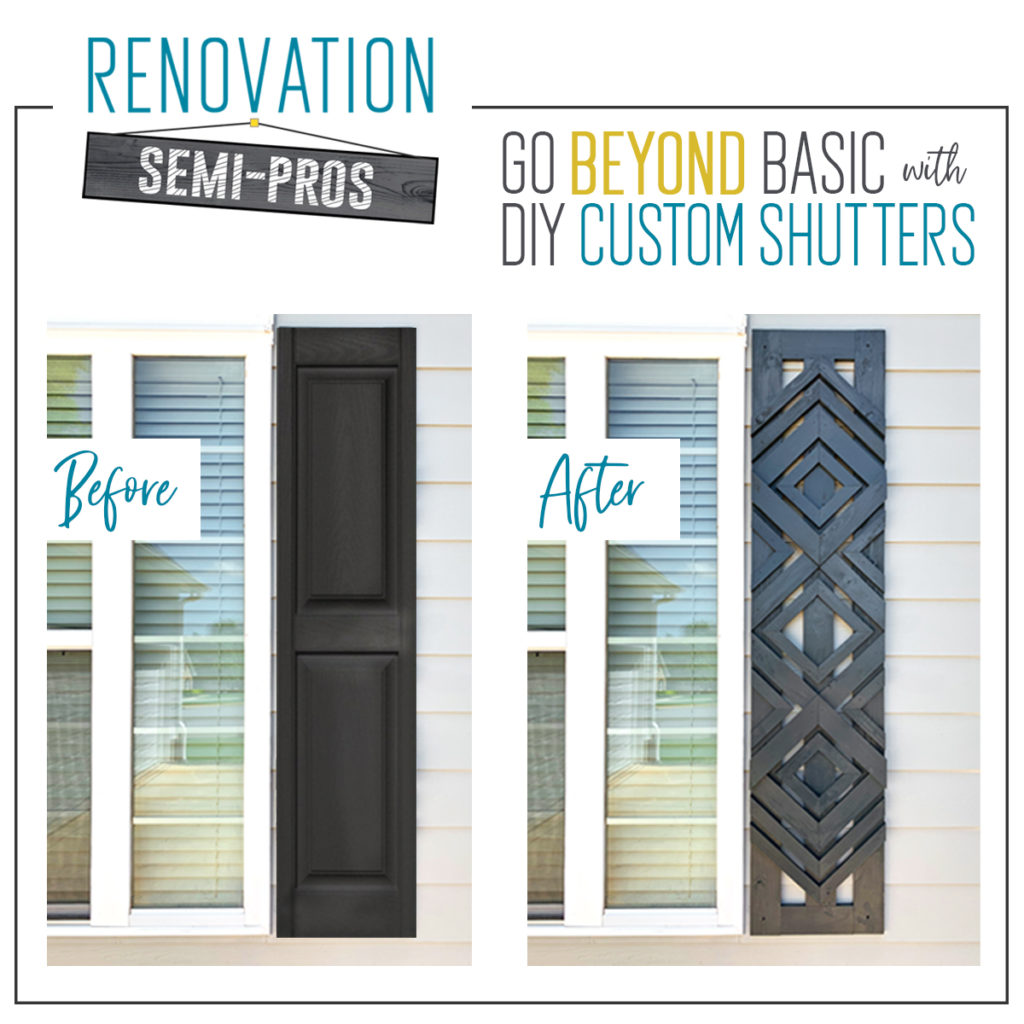
Most of the homes nearby have plastic shutters (usually solid black) that look like more of a builder after-thought than a true design element. We have noticed some newer-built homes have ‘custom’ shutters, but they’re often simple board-and-batten designs. Though we like board-and-batten (and have made them before), we decided to completely re-think everything, and of course, design and create them ourselves. Viva la shutter revolution!!
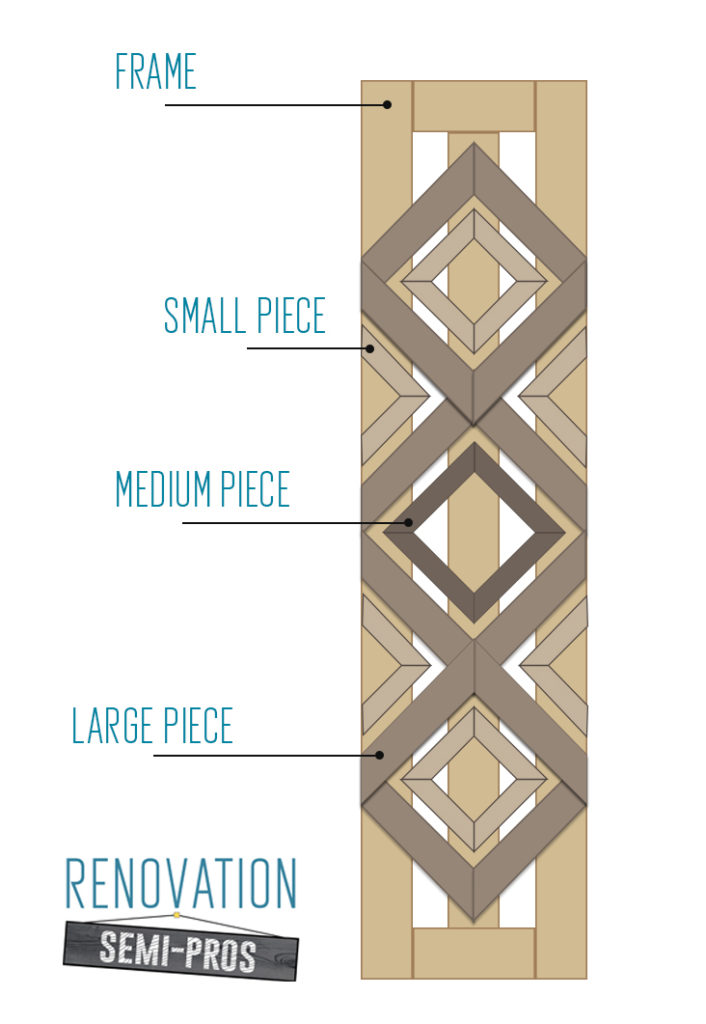
It may look complicated, but there are only 4 main ‘parts’ in this DIY custom shutter: Frame, Small Pieces, Medium Pieces, and Large Pieces. Except for the frame pieces (which are straight 90-degree cuts), all the detail pieces are cut at a 45-degree angle. This allows the assembly to be fairly easy and keeps everything lined up nicely with the frame.
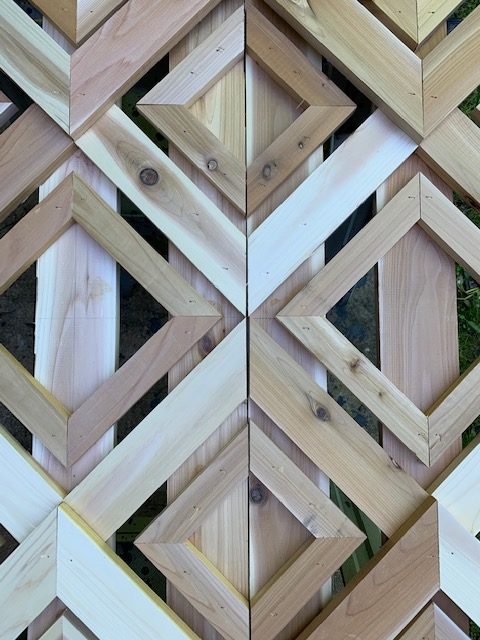
Once you cut some pieces, you can play with the design by changing the configurations of the detail pieces. The design possibilities are really limitless, especially once you start thinking about wood species, paint colors, stains, and even burning techniques (Shou Sugi Ban – video to come!)
Materials
For this project, you’ll need the following materials:
- Cedar boards* – 3.5″ wide x 3/4″ thick x length needed
- Chop saw/Miter saw
- Pneumatic air gun
- Kreg Jig
- Kreg screws
- Titebond Waterproof Exterior Wood Glue
- Stain, Paint, or Torch to burn finish (optional)
*We like to use cedar for exterior shutters for a number of reasons: 1) it’s resistant to decay and insects, 2) excellent workability, 3) fairly inexpensive, 4) readily available at most local home improvement stores, 5) amazing smell (bonus!), and 6) ideal for burned finishes such as the Japanese Shou Sugi Ban technique, but also looks great natural, poly’d, and stained.
Measurements
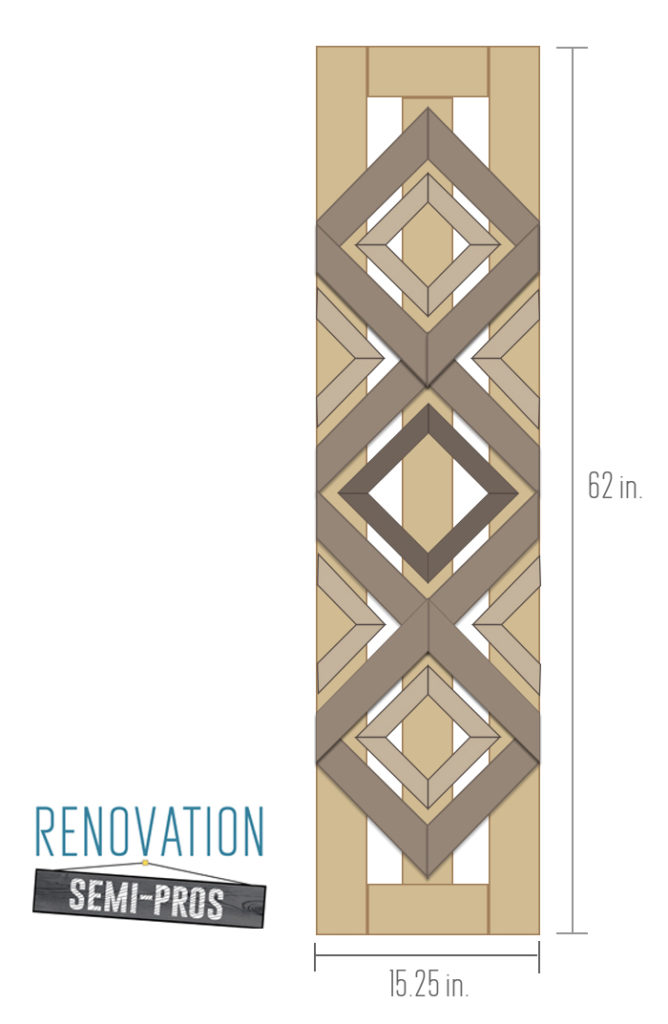
The very first step is to determine the size of your finished shutter. Here is an example Melissa created based on several of the shutters we built. Remember, the height is more important than the width.
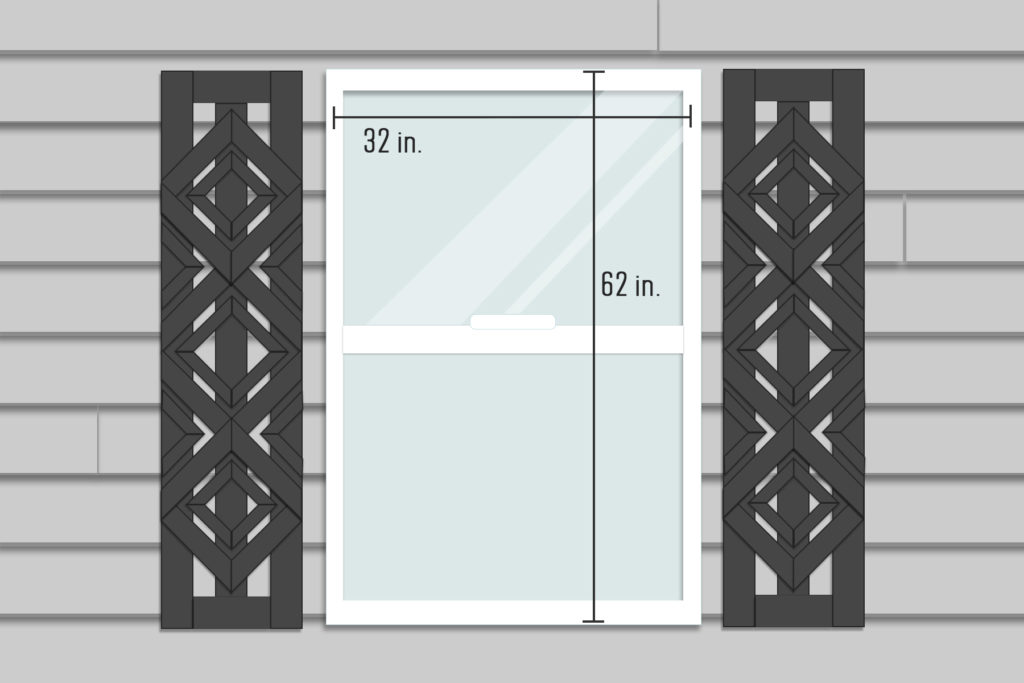
Most modern homes have standard window sizes. In this case, the window was approximately 32 inches wide by 62 inches tall. I say ‘approximately’ because although we want the height of the shutter to align with the height of the window, the width is less important.
For instance, even though this window is 32 inches wide, we made our finished shutter size only 15.25 inches wide. In other words, you have plenty of wiggle room here, so don’t fuss too much over the shutter width. We found that this 15.25″ width works just fine for windows between 24-44 inches wide.
Frame Pieces
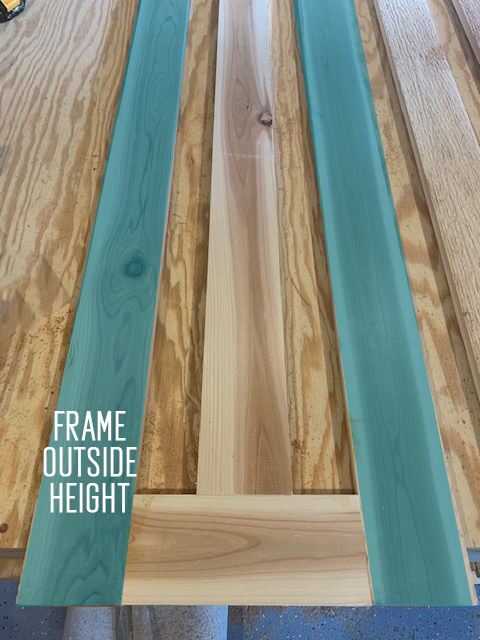
Outside Height Board
Make sure you have decided on what the dimensions (height and width) will be for the finished shutter frame. In this example, we are building a shutter with a frame that is 15.25 inches wide by 62 inches tall.
Cut the boards down to size – in our case, to 62 inches in length.
Top/Bottom Width Board
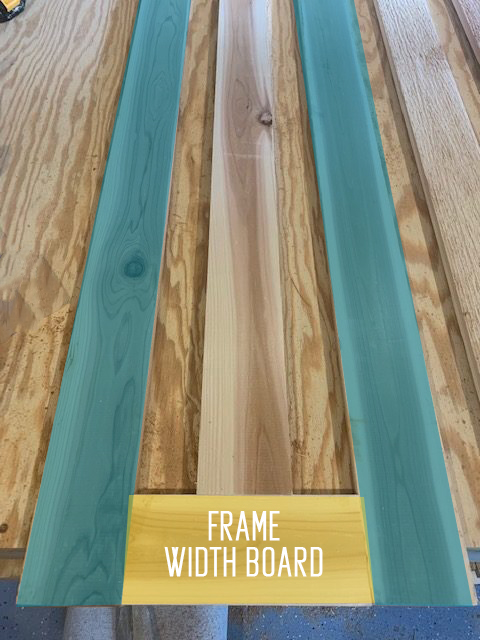
Next, cut the frame’s top and bottom width pieces.
Some quick math —- Since the 2 outside height boards are 7 inches wide put together, the width board needed to be 8.25 inches to reach our total desired width of 15.25 inches.
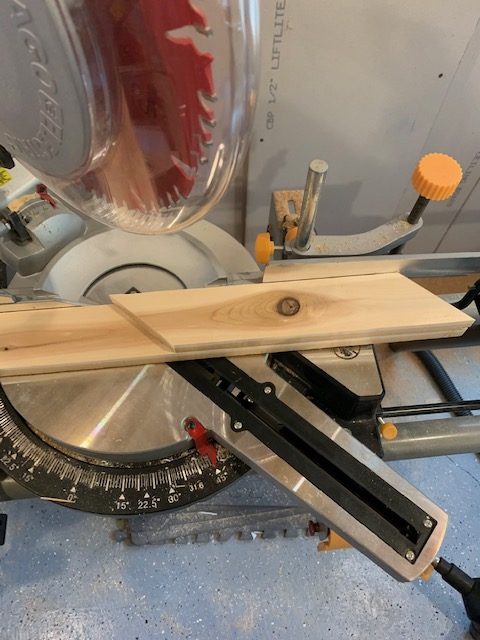
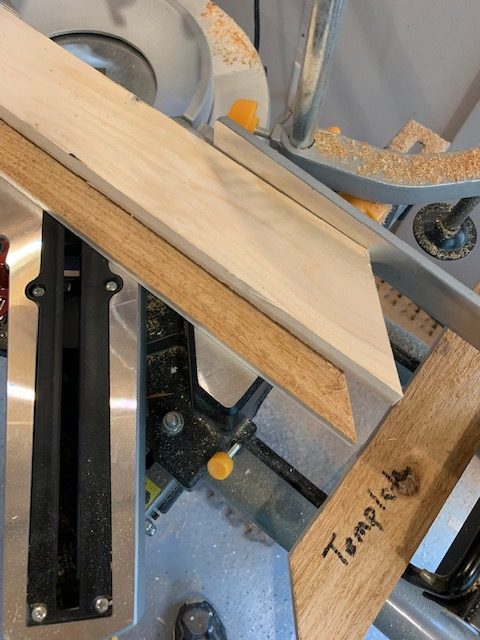
Since we were building multiple shutter frames, we stacked several pieces then cut them at once, to save time. Once the first width piece is cut, it can be used as a template for the rest.
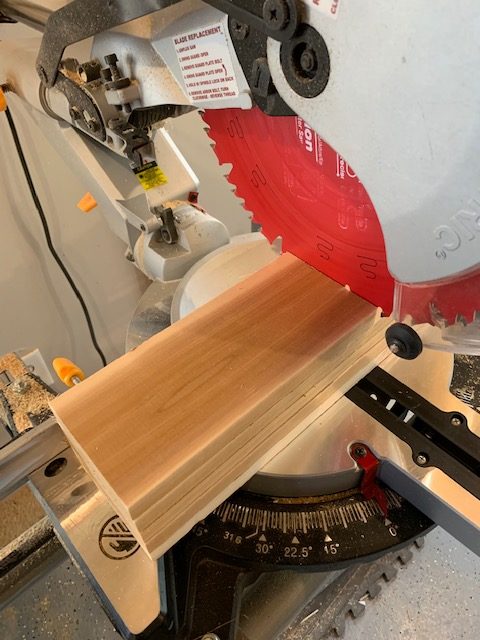
Without engaging the blade, line up all the pieces to be cut. Move them in until the template piece pushes up against the blade. Remove the template, and then cut the pieces. This method saves time and is more accurate than measuring every piece individually.
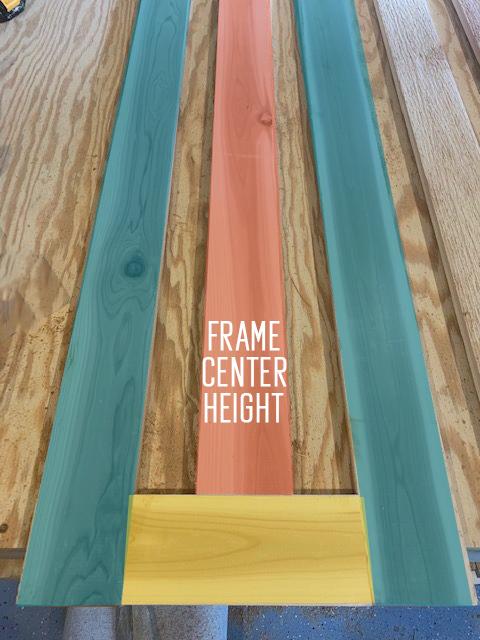
Middle Height Board
The last piece we’ll cut for the frame is the middle height board. It’s the center board of the frame.
For this design, we used a center board that was the same width as the side pieces. For other shutters we’ve done, we used a thinner board. In reality, you just need something down the middle to support the design pieces.
To find the dimensions for the middle board, take the length of the outside height board (62 inches) and subtract the width of the top and bottom width boards (7 inches) = 55 inches.
Rough or Smooth Side?
Before you assemble the frame, take a second and think about which side of the board you’d like to use: the smooth side of the cedar boards or the rough sides, or a mix of both? Decisions, decisions.
We decided to use the smooth side for this project so the finished look would be more modern. But if you are looking to go more rustic, the rough side might be a better choice.
Assemble the Frames
Now we have all the outside height, middle height, and top/bottom width pieces cut for the frames. Easy, right? ! 🙂
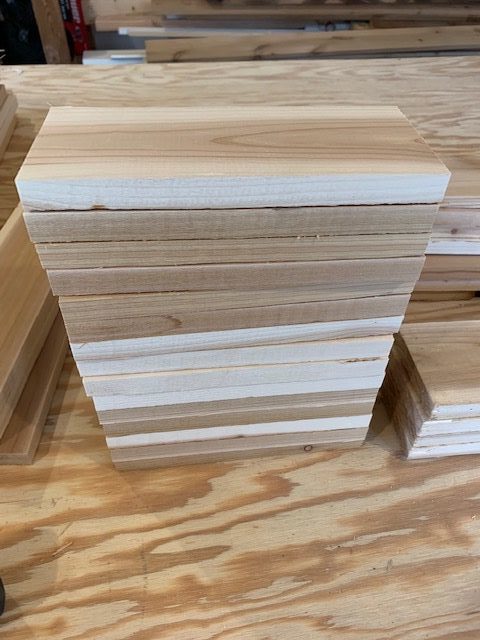
Stack of cut width piees. 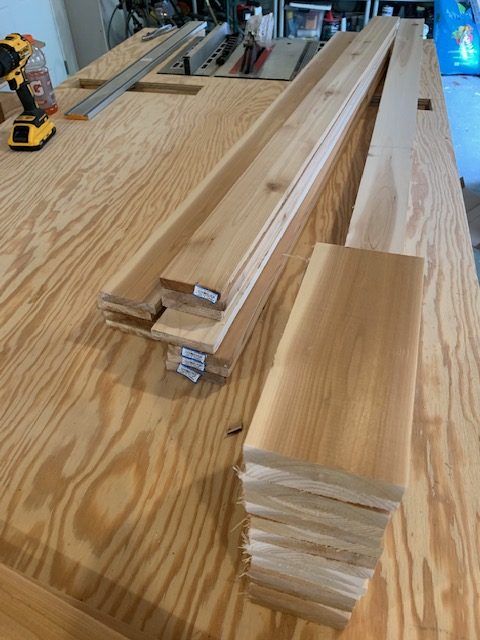
Stacks of cut frame pieces.
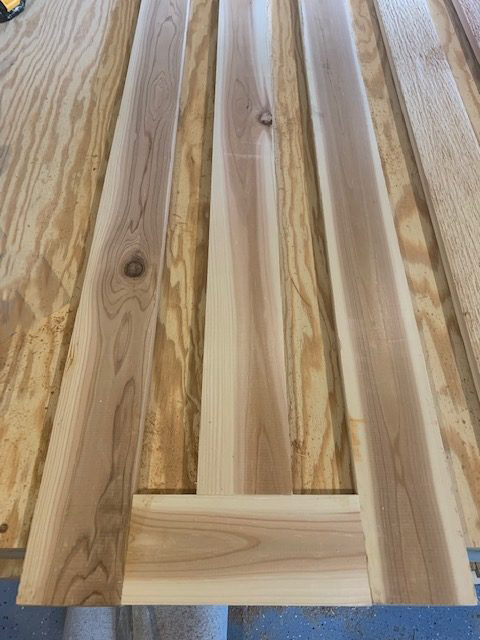
Go ahead and lay out the frame for a dry fit. Next, we will be attaching the frame pieces together.
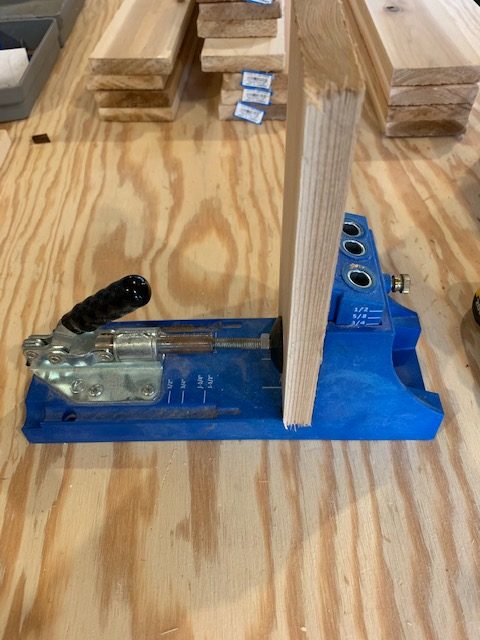
Kreg Jig
For attaching all the frame pieces together, we HIGHLY recommend using a Kreg Jig. Don’t yet know about the wonders of Kreg Jig? It’s only the best invention for woodworking in this century, especially for Semi-Pro DIY projects.
You need to have one of these kits. Once you do, you’ll use it for so many projects that you’ll wonder how you ever lived without the Kreg Jig before.
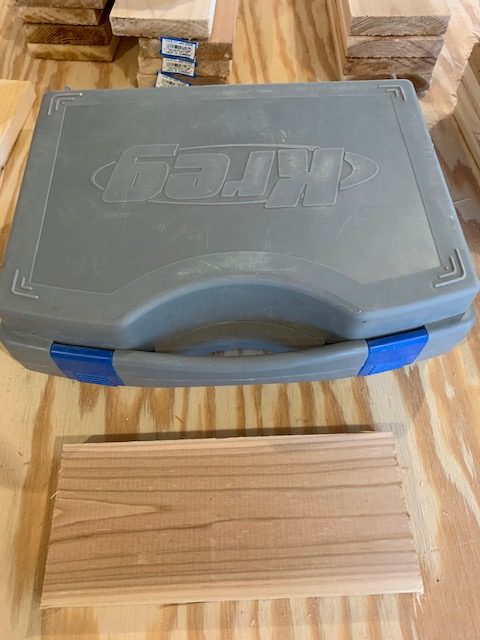
The Kreg Jig kit is made up of a jig that clamps a board tight while allowing you to drill angled pocket holes into the board. The only adjustments you need to make are for the thickness of the board. Plus, there are really good instructions online! Here’s a 1 minute setup video!

Setting Up the Jig
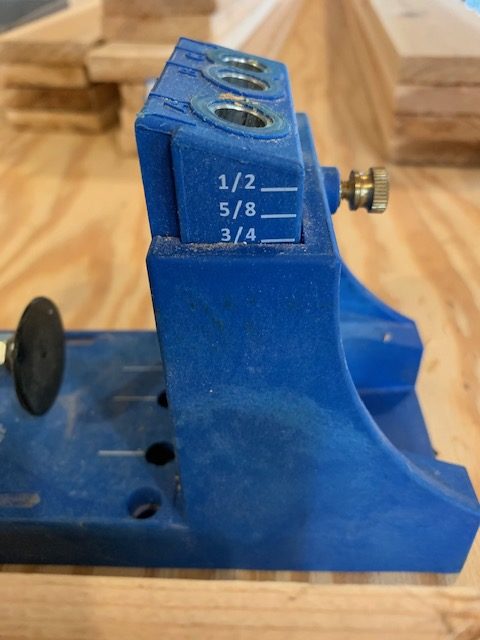
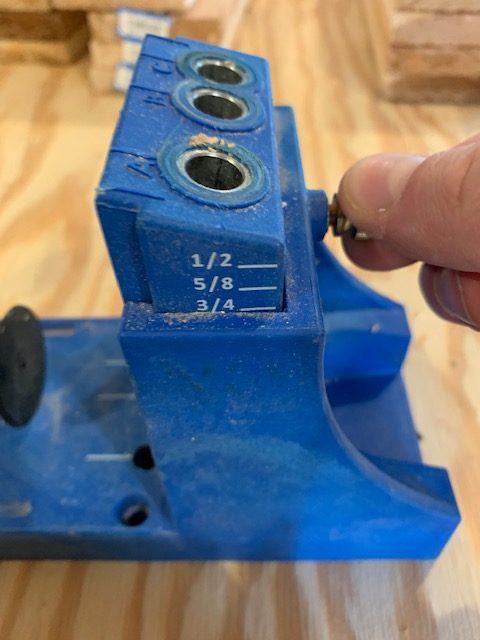
First, set the depth of the base. The depth is set according to the (actual) width of the wood. Like many wood boards sold at the hardware store, cedar comes in 3/4-inch thickness, so this will be the depth you set on the base. Tighten the screw on the side to secure.
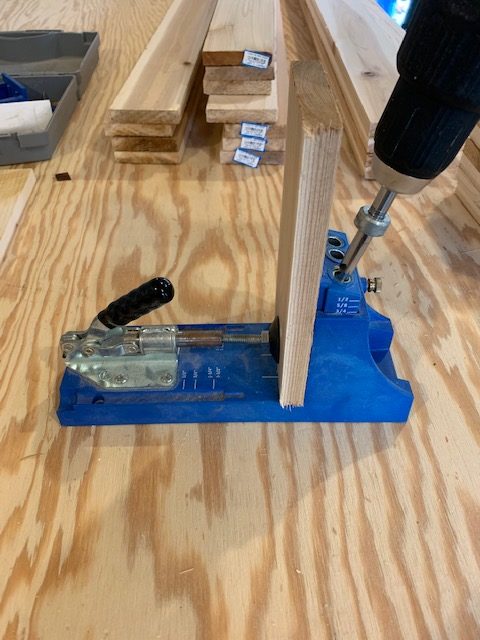
Next, you’ll need to set the depth stop collar on the drill bit (part of the Kreg Jig kit). Basically, this controls how deep the drill bit can go into the wood.
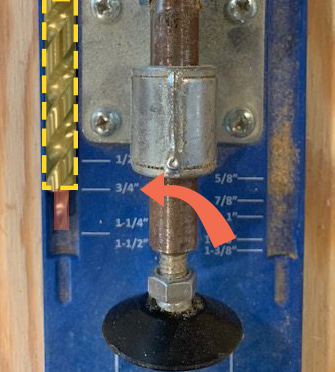
Place the drill bit in the channel on the base. Set to 3/4 inch (again based on the wood width). The end of the drilling section (the thicker section, not the stepped-down tip) needs to line up with the 3/4 inch-line.
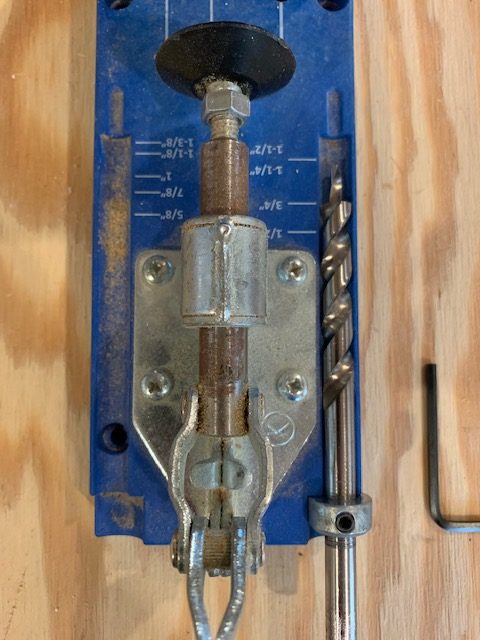
Slide the collar up to the beginning of the channel and the tighten the stop collar with a small Allen wrench. Your drill bit is set to the right depth! Now, put the bit in your drill and you’re ready to start drilling the pocket holes.
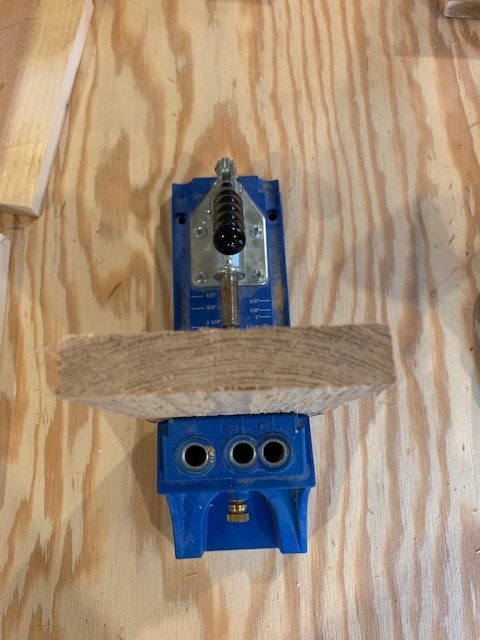
Drill the Pocket Holes
Place the middle height piece of wood in the Kreg Jig base and clamp down. This isn’t an exact science, so eyeballing placement is okay!
Next, use the A & C slots on the jig and drill two holes into the wood. Then, unclamp the wood, turn it over, and reclamp into the Kreg Jig. Drill two more hole on the opposite end.
This will create the 4 pockets we’ll use to join the center pieces to the side pieces of the frame. Repeat this process for the other width piece.

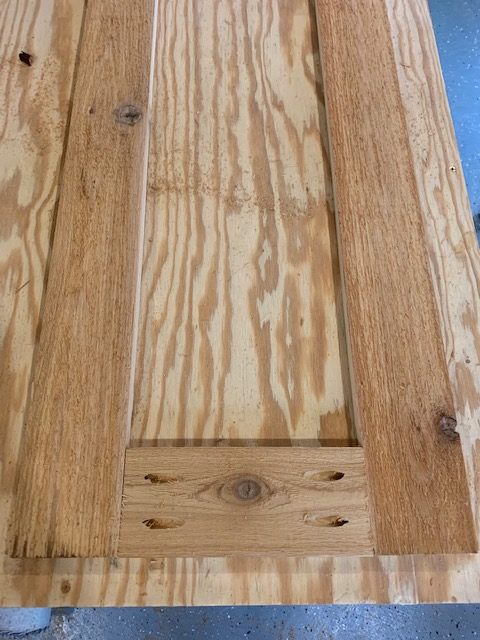
Set the width pieces and side height pieces in place. Basically, make a big ol’ rectangle!
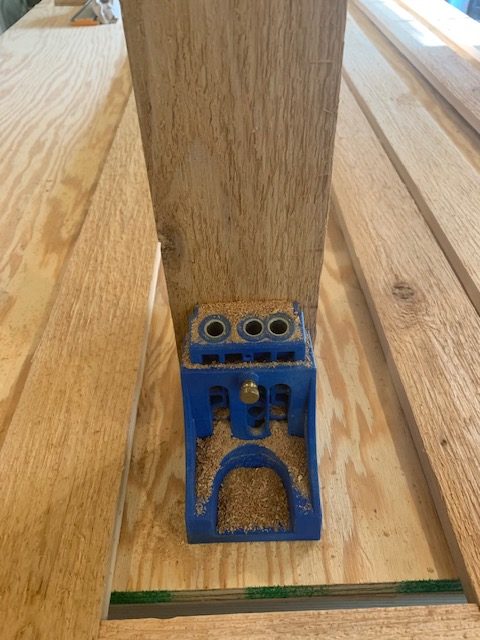
Next, drill pocket holes in the center frame piece. You may need to place the Kreg Jig base on the floor if the center frame pieces for your shutters are too long to manage.
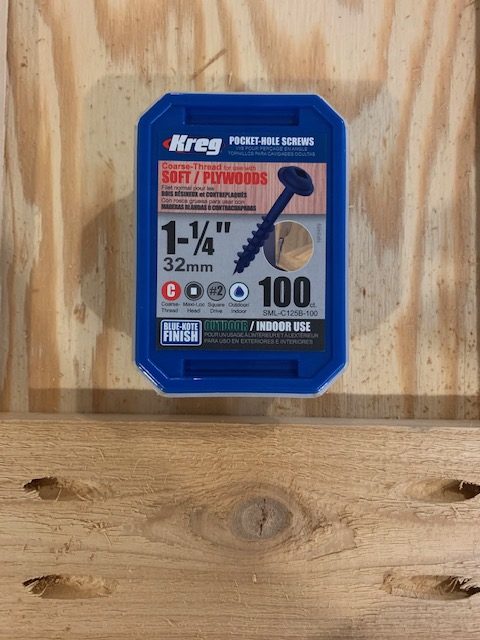
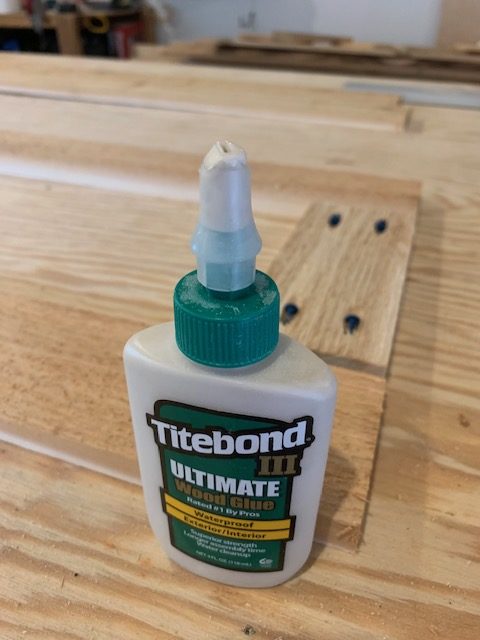
Since we want these to hold up in the elements, for this application we used exterior Kreg pocket-hole screws and Titebond Ultimate Waterproof Wood Glue.

Add glue to the ends that you’ll be connecting and then slide screws into each of the holes.
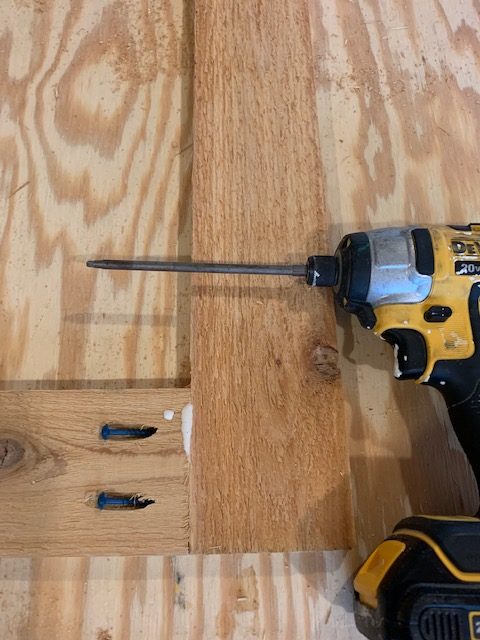
With the screws in the pockets, drill them in using the square-head bit that comes with the Kreg Jig kit. Make sure the screws are tight, but not too tight. Cedar is soft and will crack if you overdo it.
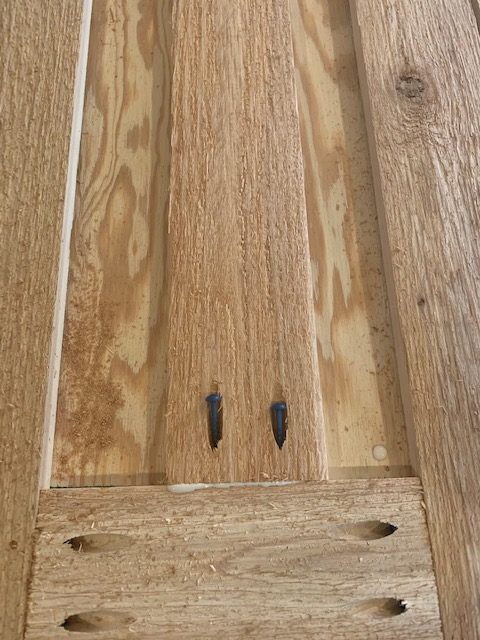
Do the same for the center piece – glue the ends, then tighten the pocket screws. The frames are finished. Time to add the detail pieces to your DIY custom shutters.
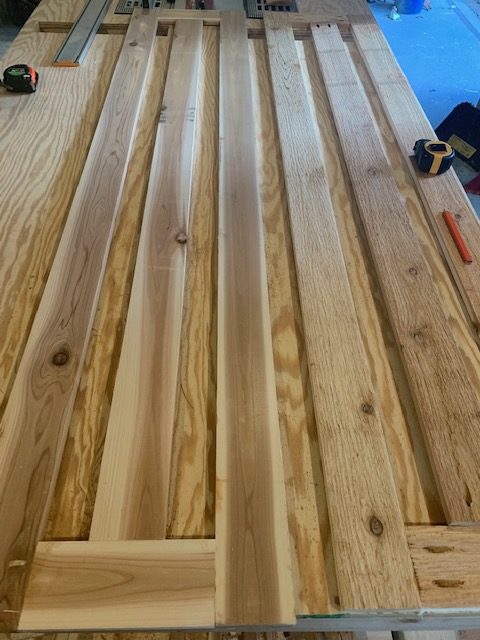
(Right) Back of a shutter – rough side with pocket holes visible.
Adding Detail Pieces
Once the frame is constructed, you will work on the detail pieces.
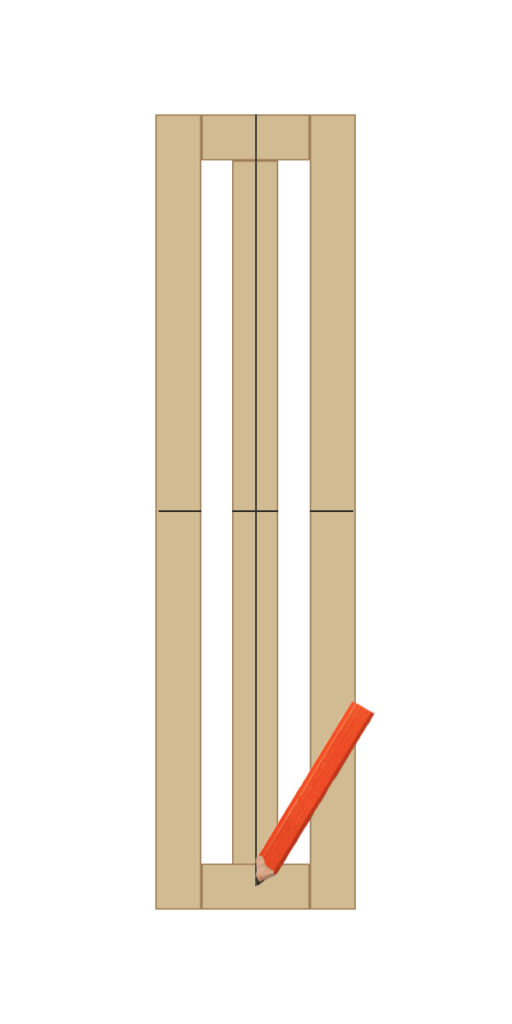
First, you’ll need to find the center of the frame. We marked at 7 5/8 inches for the center of our shutters. Use a drywall or other long T-square and draw lines across the center board and to both sides. You’ll need these lines when you begin placing the detail pieces on the frame.
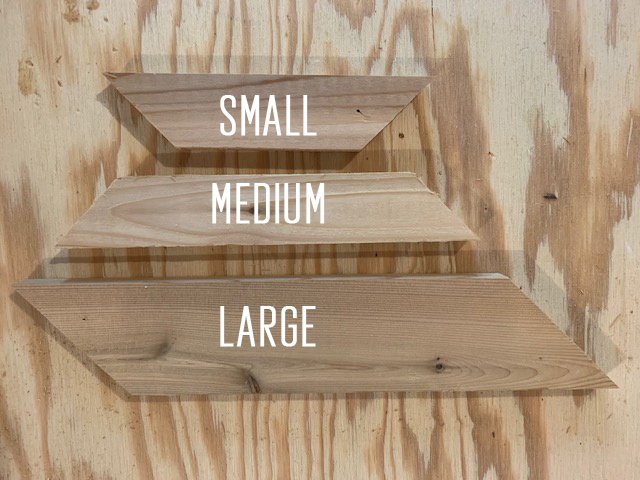
The detail pieces themselves come in just 3 sizes, so we oh-so-creatively named them Small, Medium, and Large.
Taking a quick look back at the color-coded mockup, you can see that there are a lot of the large pieces (12 for each shutter), and quite a few of the small pieces too (16 for each shutter). There are just a few (4) of the medium sized pieces.

It is a great idea to create a template piece for the small and large sizes and can help make quick work without needed to re-measure each time.
The large pieces are 3 inches wide (2.5″ actual). The medium and small pieces are 2 inches wide (1.5″ actual). The angles are going the same direction on the large pieces – everything is cut on 45 degrees.
Cutting the Large Pieces
The angles will be opposite on the medium and small pieces, so they create a diamond shape. Think about this when you’re cutting, especially if you are trying to have rough or smooth cedar sides stay consistent.
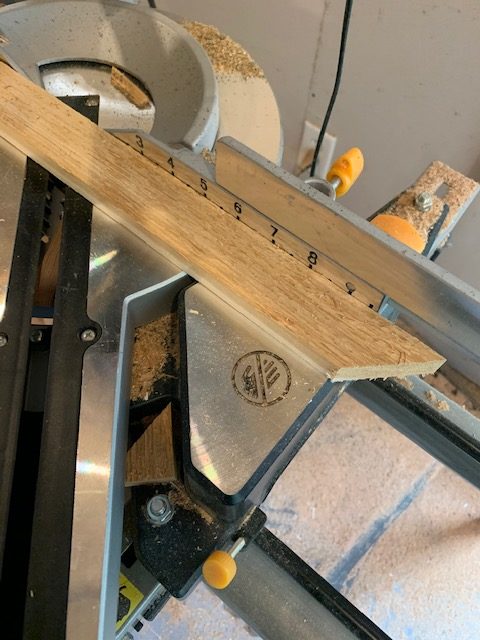
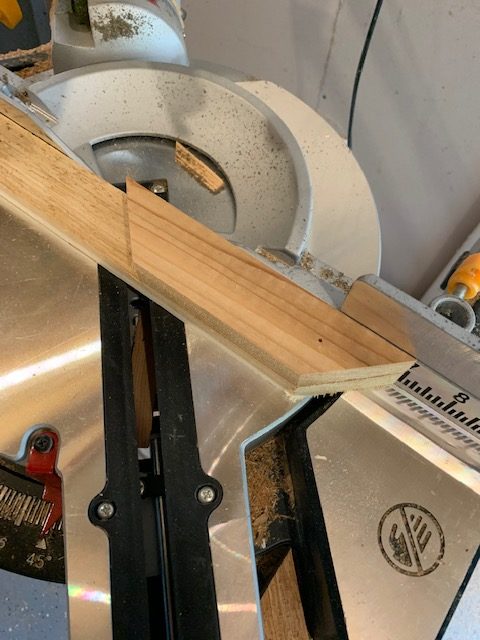
Set the saw to 45 degrees. Cut both ends of the piece at the same 45-degree angle. Cut it at little longer than you’ll need (longer than from the center to the edge). We’ll trim the length to create the template next.
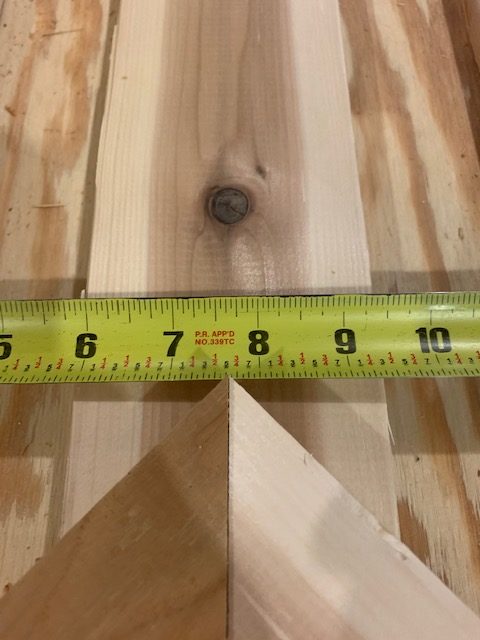
Line up 2 pieces at the center point. Mark the pieces with a pencil to get the exact length for the large detail piece template. Once you have this template, you’ll be able to cut all of these pieces for all of your shutters. Make sure it’s right!
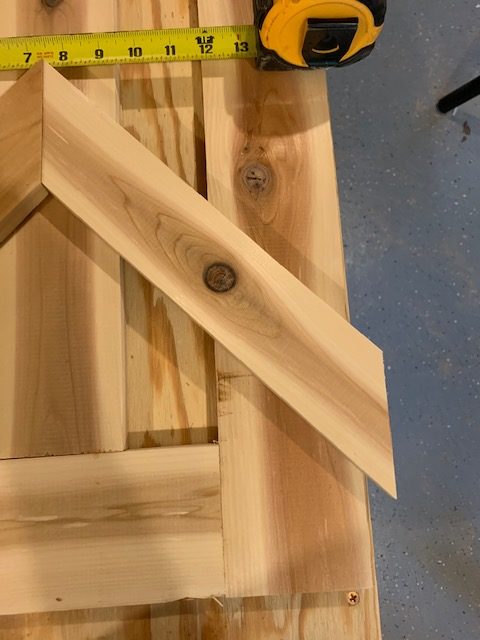
See the overhang, mark the section to be trimmed. 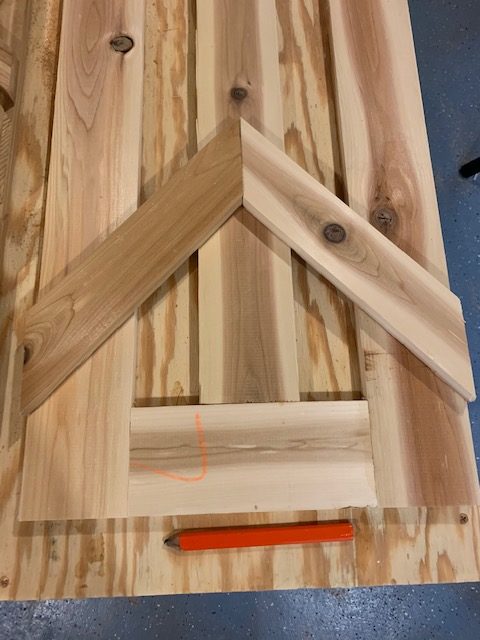
Here is the large detail template trimmed to fit.

Once the large detail template was created, I was able to quickly chop enough wood for the 12 pieces.
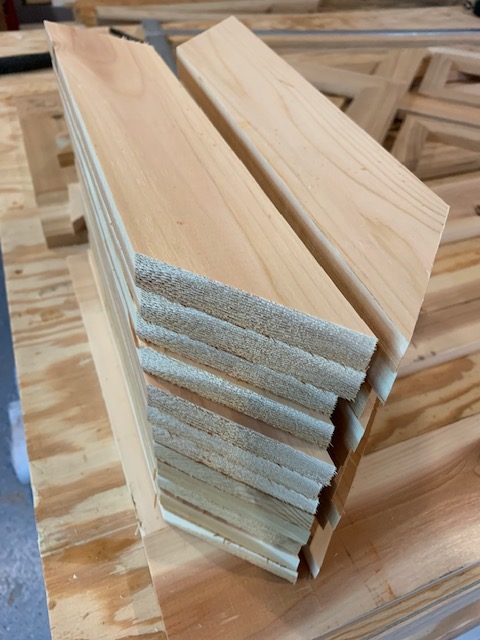
Attaching the Large Pieces
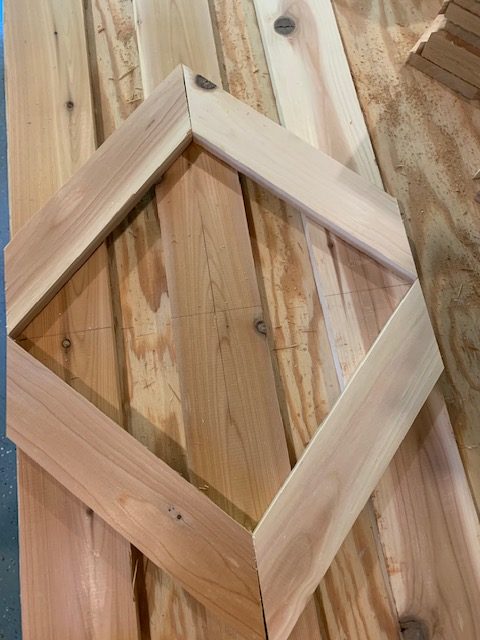
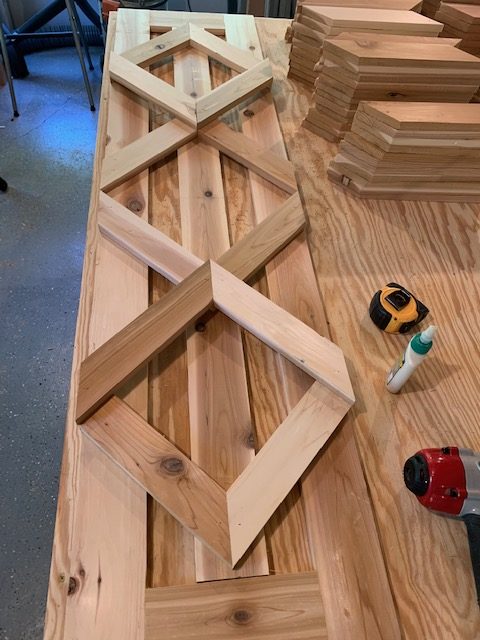
Place the first set of large detail pieces (x4) on the frame. Line up the with the center marks you made. It’s important this set is placed correctly since the rest of the pieces with be aligned based on these. Use some wood glue and tack them down with the air gun. We used 1.25 inch (18 gauge) finishing nails. The nails will hold everything in place until the glue dries.
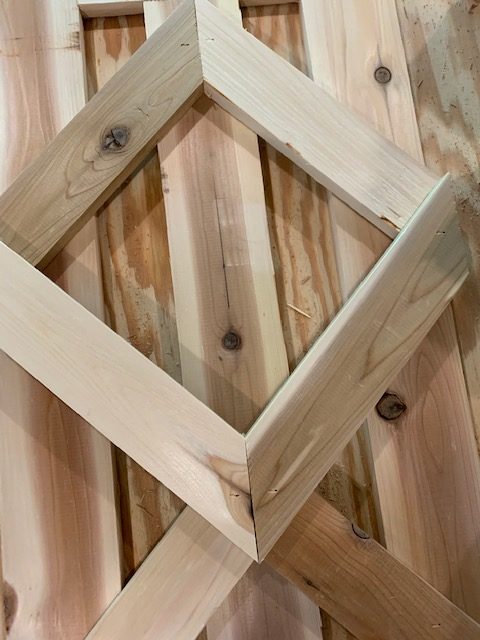
For this design, we overlapped the first 2 pieces of the top/bottom detail pieces over the center set. This adds some depth/interest to the design and will create amazing shadows when the shutters are placed on the house.
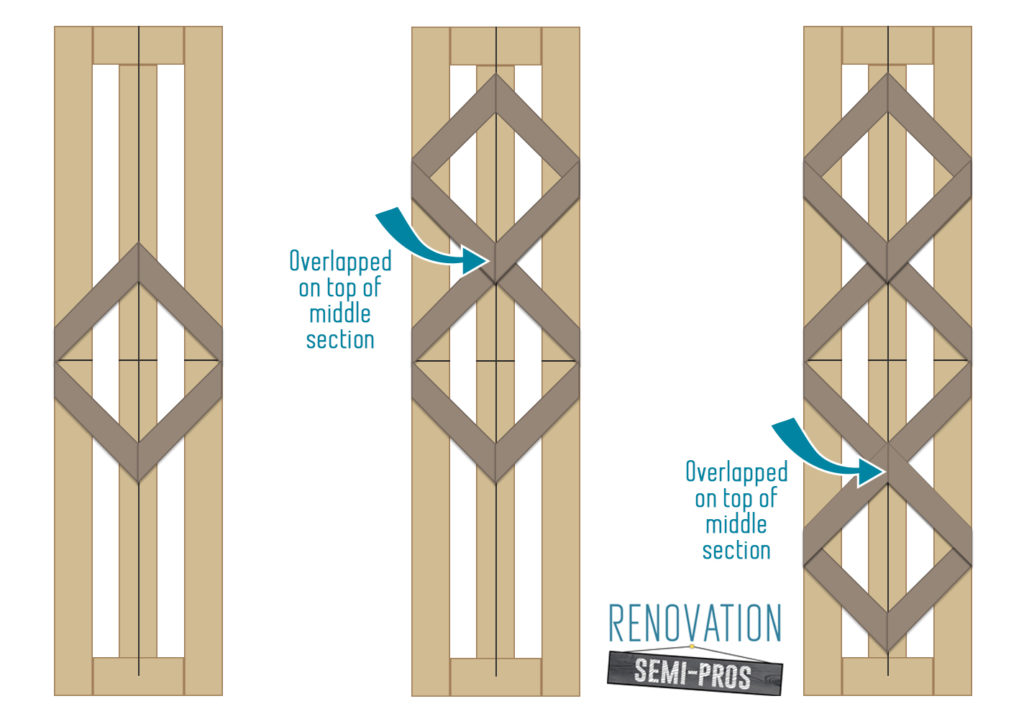
Here are the steps for the large pieces again, via illustration:
Cutting the Medium Pieces
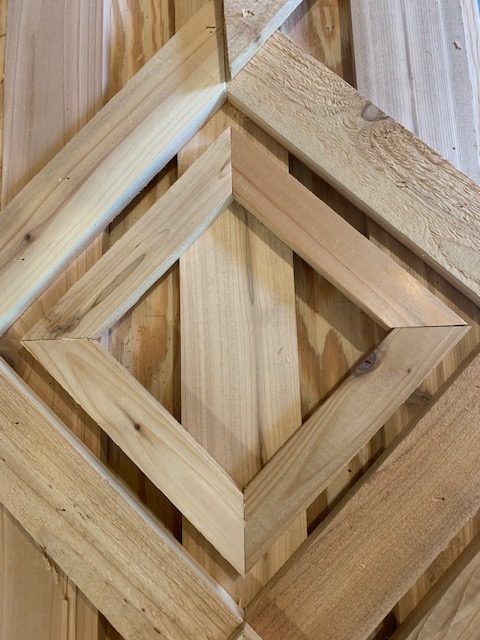
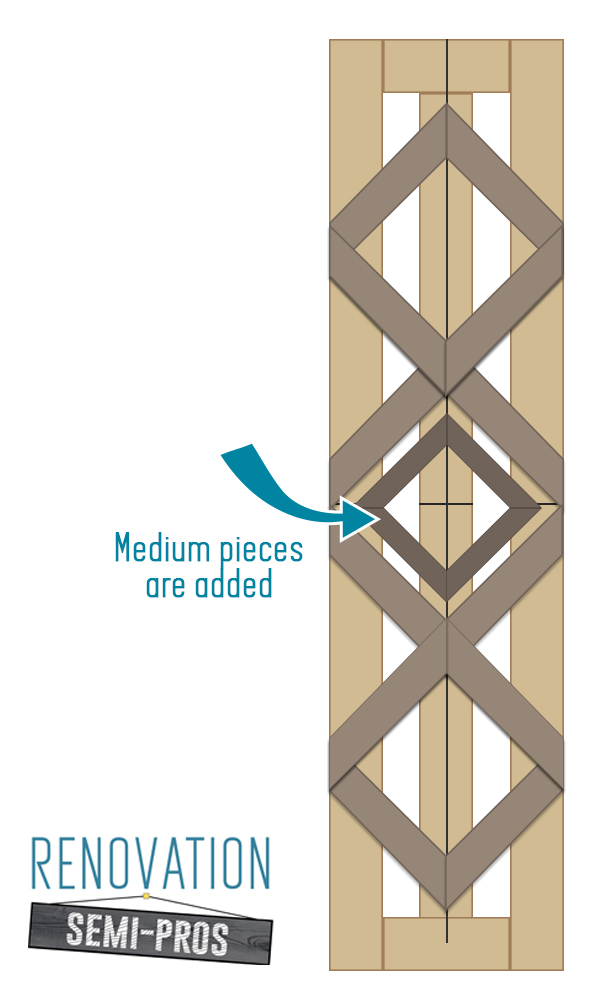
Start with the center diamond-shaped detail. You’ll only need 4 pieces (medium size) for each shutter.
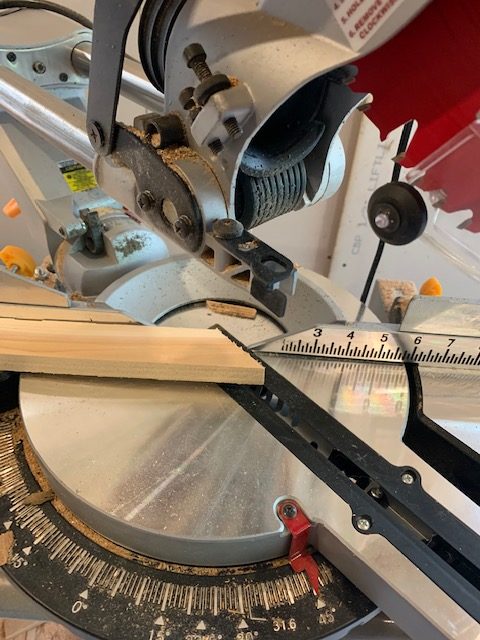
To cut the opposite angle, you don’t need to adjust the blade. Just flip the piece over, use your template for size, then cut. Be careful though: the pieces are small and the work is repetitive.
Here is where to add for the medium pieces again, via illustration:
Cutting & Attaching the Small Pieces
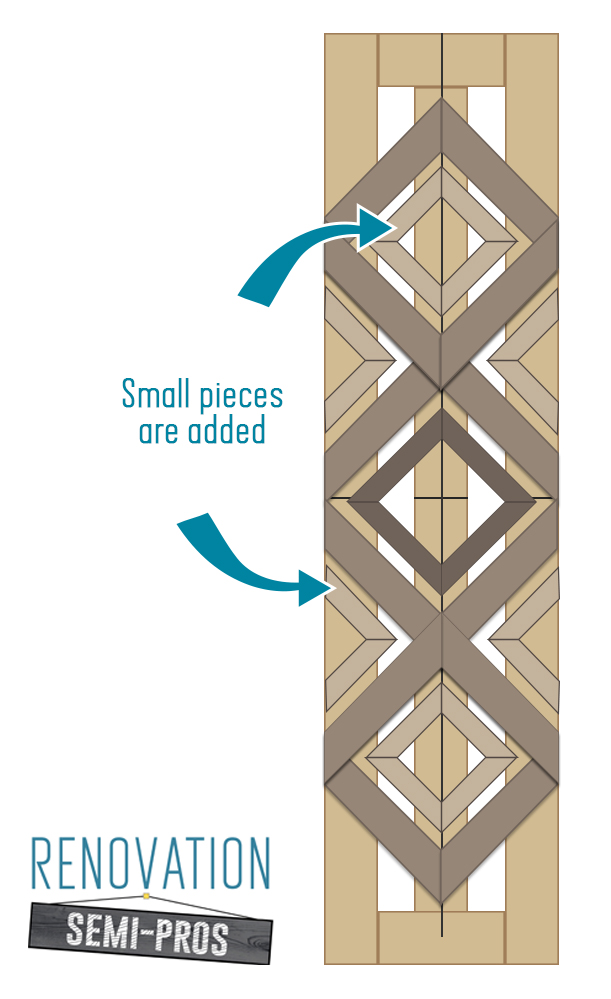
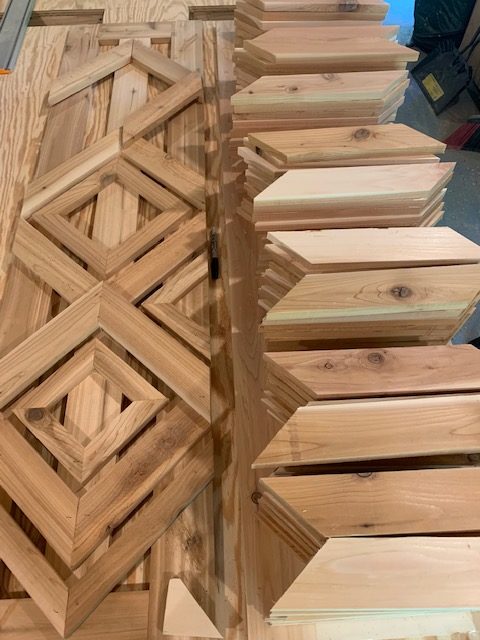
Using another template, I cut the 16 small pieces needed for this shutter pretty quickly.
The small pieces are used as insets for the large pieces. They are also used on the outside of the larger pieces, to add detail. Here are the steps for where to add the small pieces, via illustration:
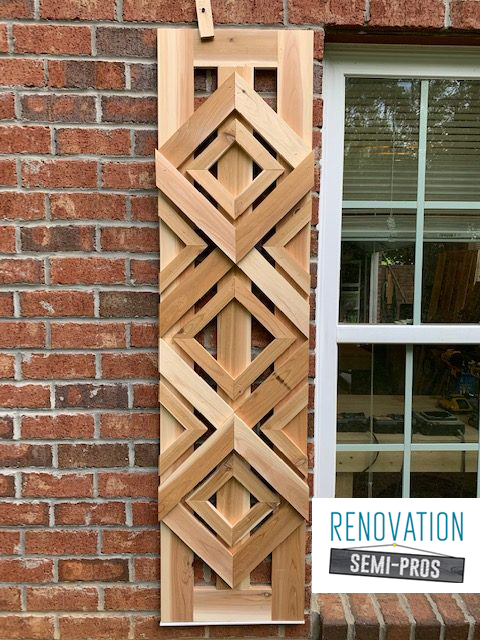
Finishing the Shutters
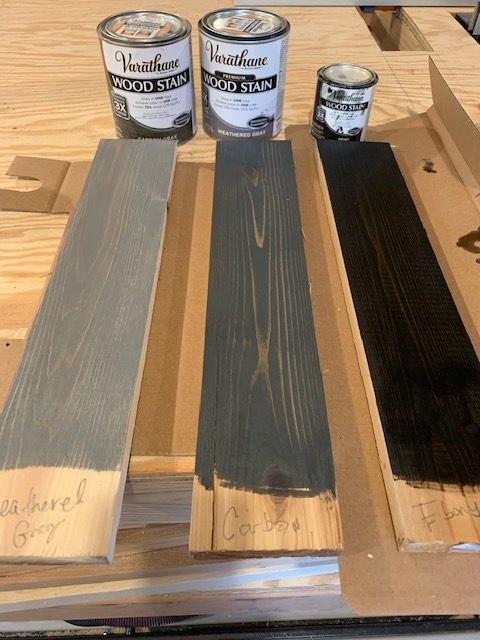
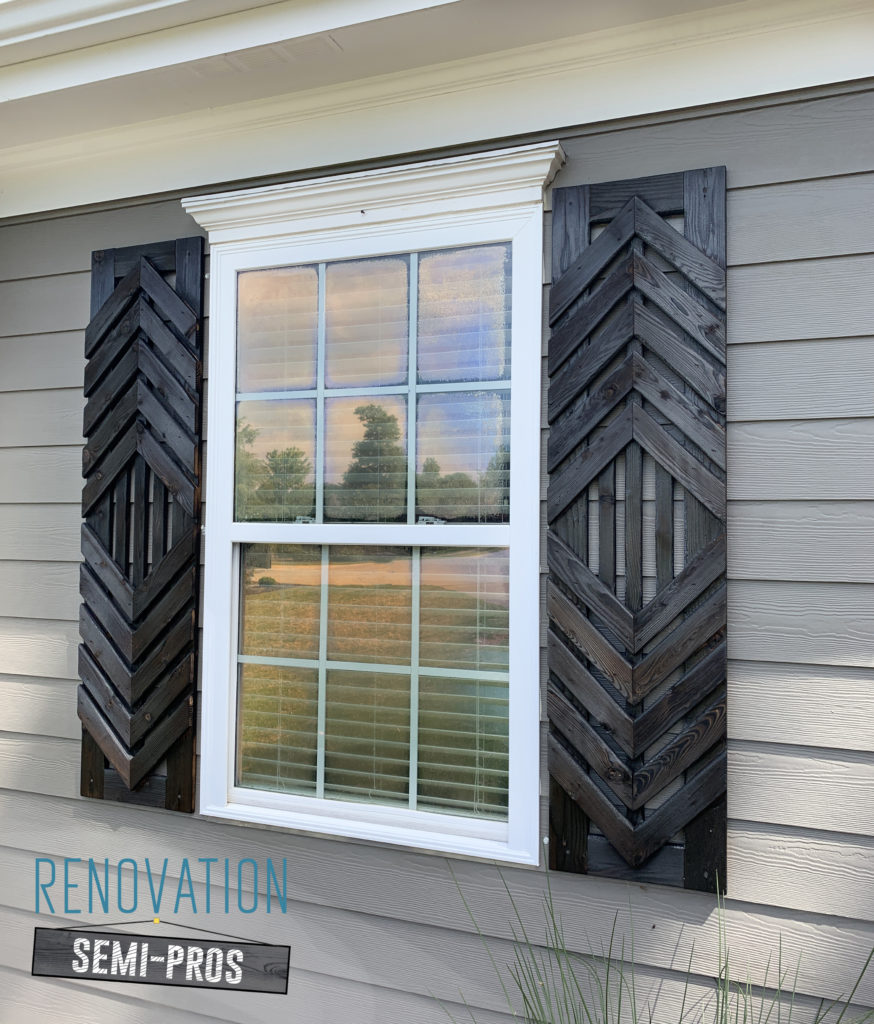
There are many finishing techniques you can use for your shutters. Since we used cedar, you can leave them bare and let them weather to a gray patina. You could also add a simple coat of exterior/spar polyurethane and allow them to be ‘cedar colored.’ You can char the surface, using the Shou Sugi Ban method (example below). You can also stain or paint the shutters whatever color you’d prefer.
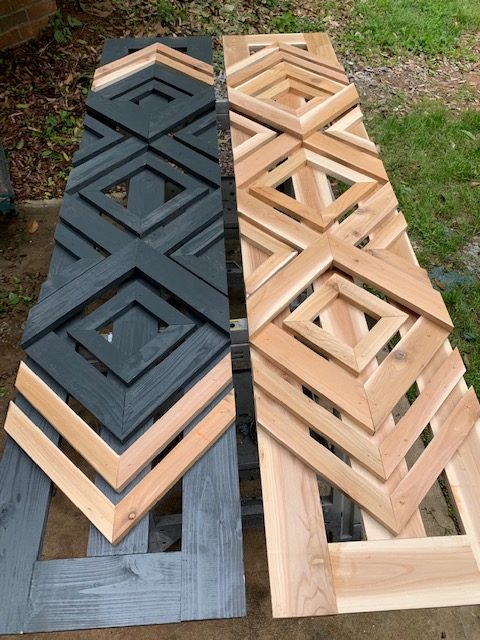
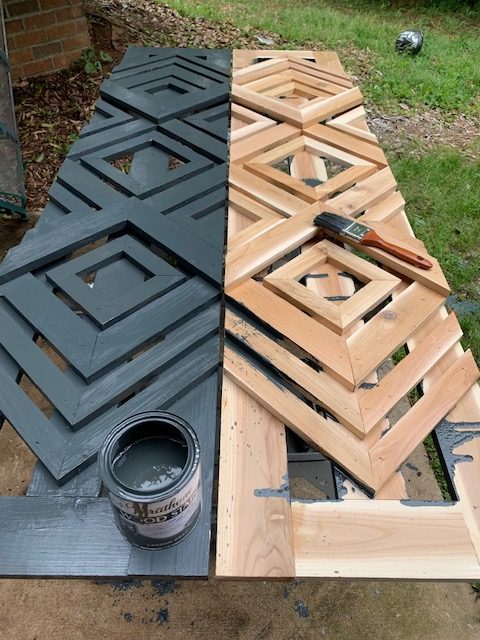
For this project, which we actually made for one of our wonderful neighbors, we decided to go with Varathane’s Premium Fast Dry Wood Stain Carbon Gray. We put it on pretty thick and did not rub any off with a rag like you normally would with stain. This gives the shutter a deeper, more uniform look, but the wood grain is still visible.
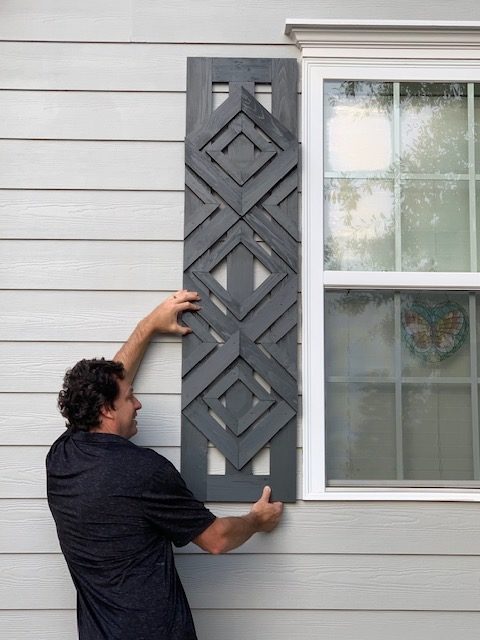
Note: We had two extra tall windows on our neighbor’s home, and for those shutters, we added 2 additional small detail pieces to the top and bottom. This filled in the gap between the last set of large detail pieces and the end of the shutter on a particularly long window. And, Chris likes anything with arrows. “We need more arrows!”
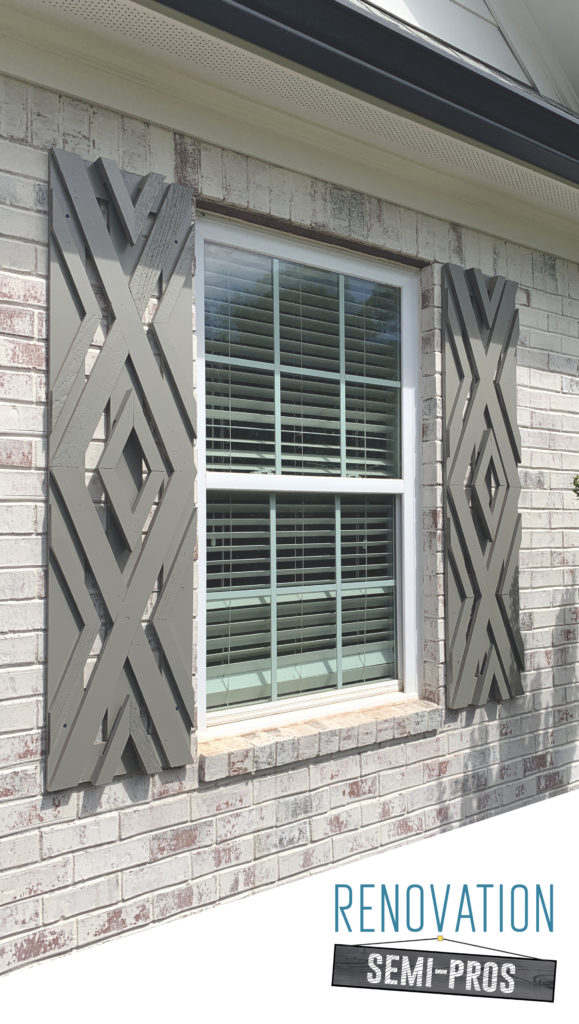
Here is some more inspiration for your own DIY custom shutters – but feel free to let your imagination run wild…….
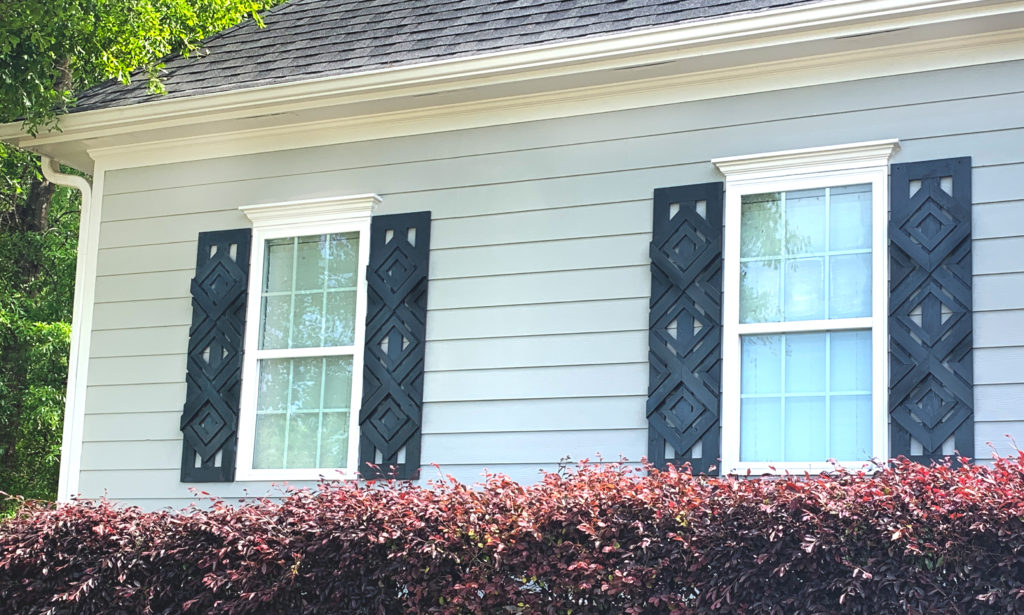

We hope you enjoyed this post! Has it inspired you to create something special for your home?
If you found this post useful and inspiring, save THIS PIN to your Shutter Projects board on Pinterest.



Looking for full directions on your Modern Dimentional shutters (the one with the diamond in the center), how do I go about getting those?
Do you have instructions on building the arrow style shutters?
These are very nice looking shutters! You definitely could create a design of your own once you get to cutting and designing. I’ve wanted new shutters ever since we bought our home 8 years ago. Not a top priority at first but the more I shop the more I want to get this done. Thank you so much for sharing the cuts, measurements and designing! It greatly helps for someone who wants different!
I would like to follow your blog.
Thank you
You guys are awesome!
Did you rip regular boards to get the widths for the smaller pieces, or did you buy them in those widths.
Hey, I assume the materials list is the same, but my wife loves the arrow design, but the frame’s center pieces are different than the diamond one you did the instructions for. If I may, what width did you use for those the pieces? Also, was there anything you did different for that design, outside of the 3 pieces in the center frame?
Hi I was wondering what size width where the small, medium and large detail pieces I didn’t see that . Also did you buy them in that width already or did you have to cut them to that width. I plan on making alot of these and making a privacy wall for my pergola. Thank you
Not a duplicate comment, an edited, correct oneSee how easy it is to make a typo on sizes, LOL? My comment should have read “There is no way your large trim pieces are THREE 1/2 inches wide (the same width you list for your frame pieces.) They appear to be TWO 1/2 wide, …”
Hi George, You’re so correct! This was a typo I could have sworn I corrected in the past, but it looks like it didn’t “stick.” Those large trim pieces are 3″ (2.5″ actual). I double-checked and it’s showing up now. And yes – we’d love to see your creation! If you’re on Pinterest, you can add your comment and pic to one of our pins on this project — https://www.pinterest.com/pin/492649947788771/ Thanks again for the kind words and reminder that math is important! 😉
There is no way your large trim pieces are 4 1/2 inches wide (the same width you list for your frame pieces.) They appear to be 3 1/2 wide, with the small & medium trim at 1 1/2 inches wide. I base this on every single photograph you showed and actually building a set of four shutters. Cedar boards at HD and Lowe’s were only available in two widths, so rather than ripping the large trim pieces with a table saw I don’t own, I’m doing some extensive redesigns. My shutter aspect ratio is very different from your tall thin ones, being 20″ wide and 52 1/2 high to match the house Anderson 4’x4 ‘windows and look closer to a functional shutter, though decorative. I’ll send pix if you like.
Can I order these from
You!’????
Hi Toni – Although we have built these for others in the past (hello former neighbors!) we do not build them currently. The truth is our other projects and newest renos keep us busy! But, if you don’t feel comfortable DIY-ing them, any local carpenter should be able to follow the design we’ve laid out to create something just as nice. 🙂
How many cedar boards of each width (1×2, 1×3, and 1×4) did you purchase per shutter to complete the build? I have a customer that wants 7 sets of various lengths and I’m trying to get the materials list together, thanks
I have to say, the details of your work and how you have presented the whole article deserve some applause. Great work with DIY shutters. Keep it up you two!!
Thank you so much for the kind words Adam!
I have a question. How long are the small, medium and large pieces for the diamond?
I only see the width but not thr length.
Hi China, It REALLY depends on the size you’re creating and the window you’re framing. We did not include those specifics because it would range based on both sizing and preference. We did a mockup (well, a couple of them to be honest) and use the one we like the most as our template/guide. This allowed us to fine-tune as we went. We also used paper templates to quickly lay things out and see what we liked. That is a great, low cost, low commitment way to layout the size too. I hope you can find what works for you and your windows!
Hi – we love these shutters. for the shutter with the single diamond in the middle (last picture posted – Modern Dimensional), what size wood did you use for the framing? What sizes for the other pieces? Thank you
Hi Karen, We used 3″ wide pieces (actual 2.5) for the and the smaller detail pieces are 2″ wide (1.5″ actual), and the frame itself is just the raw size from the store (labeled as 4″, actual 3.5″). We’d love to see pics of your finished shutters if you build!
Love the look of these! How did you hang them on the brick house?
Hi Lisa! We drilled into the mortar between the bricks using a masonry drill bit, then screwed the shutters up using masonry screws (Tapcon is the brand we used). We also predrilled the shutters themselves with a regular drill bit, so the screws wouldn’t split the wood. It was actually pretty simple once we did the first one. Good luck to you on your project!
How long are the angled pieces?
Hi Jenna, The length of the angled pieces depends on the overall width of the shutters. Once you have the frame completed, you can begin at the center point, determine the length, and then cut the template piece.
Hi, your “diamond shaped” shutters are just what I’ve been looking for! After reading your post and materials needed I have a question. The frame uses 4” wide boards (actual 3.5). Are the large detail pieces the same width as the frame pieces? By looking at the photos, it looks like the frame pieces and large detail pieces are different widths.
I look forward to hearing back from you so that I can get started on these. I can’t wait!
Thank you
Nancy Hayward
Hey Nancy, The large detail pieces are 3″ wide (actual 2.5) and the smaller detail pieces are 2″ wide (1.5 actual). Send us some pics when you finish.
I’ve started these shutters but in typical “Nancy fashion”, I find that I like the modern shutters you’ve painted medium gray. Do you have instructions for those?